

Transforming an entire home or villa is one of the most rewarding investments you can make for your family's daily comfort. A successful overhaul turns an outdated, cramped property into a beautiful, harmonious sanctuary where your family can live happily and thrive together.
However, jumping into demolition without a comprehensive whole house renovation planning strategy quickly leads to spiraling costs, disjointed designs, and unnecessary stress. Master-planning your home from start to finish ensures every room works in harmony, every dollar is spent intentionally, and your final result matches your vision.
Whole House Renovation Planning: Start With the Big Picture
When you commit to a whole home renovation planning process, your primary objective is to create a cohesive lifestyle environment rather than a collection of isolated room projects. Tackling a house room-by-room without an overarching blueprint leads to clashing floor materials, mismatched architectural details, and duplicated plumbing or electrical labor.
Effective house renovation plan execution relies on three foundational steps:
- Evaluating Family Routines: Understanding how your household moves through common areas, works, cooks, and relaxes.
- Establishing Unified Infrastructure: Updating electrical panels, HVAC networks, and plumbing stacks across the whole building simultaneously to save on trade labor.
- Defining Spatial Harmony: Ensuring sightlines and flooring choices transition smoothly from room to room.
Starting with the big picture protects your budget while establishing a clear direction for every trade professional involved.

Decide What Needs to Change in Your Home
Before selecting paint chips or kitchen tiles, conduct a thorough audit to determine if your house is worth renovating before investing and separate critical repairs from cosmetic desires. A successful whole house renovation balances underlying structural health with visual improvements.
Review this essential whole house renovation checklist during your initial walkthrough:
- Structural & Envelope Health: Inspect the foundation, rooflines, window seals, and exterior siding for water intrusion or structural settling.
- Mechanical & Utility Networks: Evaluate the age of your electrical panel, heating and cooling units, and primary plumbing drains.
- Spatial Efficiency: Identify dead hallways, awkward door swings, and dark corners that restrict daily movement.
Categorizing these issues early during home renovation planning prevents unexpected structural surprises from consuming your finish budget later.
Set Your Renovation Priorities Before Choosing Finishes
Decision fatigue is the biggest risk in large-scale remodeling. Applying Hick's Law—reducing options to limit cognitive overload—helps establish clear renovation priorities before you browse material showrooms.
Organize your project scope into three distinct investment tiers:
| Priority Level | Focus Area | Typical Project Scope | Impact on Daily Life |
|---|---|---|---|
| Tier 1: Non-Negotiable | Critical Infrastructure | Roof repair, panel upgrades, moisture mitigation | Essential safety and structural protection |
| Tier 2: High Utility | Spatial & Functional Flow | Kitchen opening, adding a bathroom, built-in storage | Directly removes daily friction and frustration |
| Tier 3: Aesthetic Enhancements | Visual Surfaces | Custom trim, accent lighting, wall treatments | Elevates mood, texture, and visual character |
Establishing strict home renovation priorities prevents scope creep and ensures your capital goes toward the features that improve daily living most.
Plan Every Room Before Starting the Work
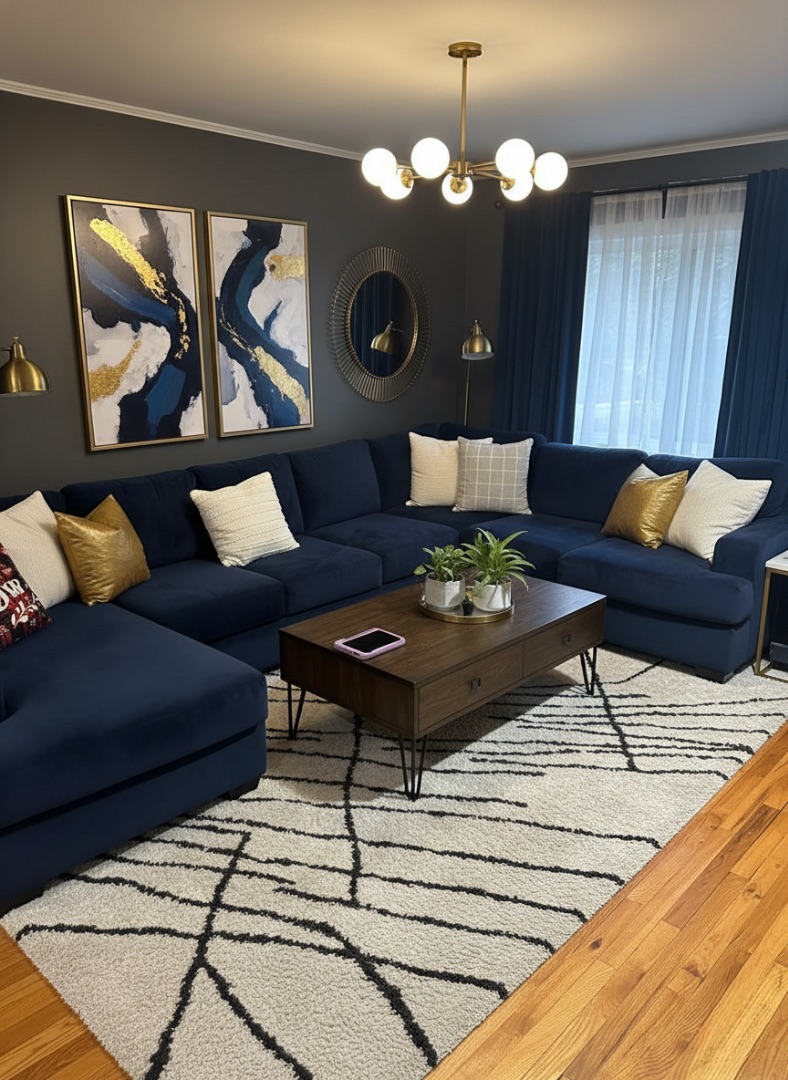
A common mistake in whole house remodel planning is treating rooms as independent silos. Applying Gestalt design principles—where the whole space is perceived as greater than the sum of its parts—ensures your entire home feels balanced and intentional.
When building your whole home remodel plan:
- Maintain Consistent Casing & Trim: Use identical baseboard profiles, door trim, and hardware finishes across all floors.
- Align Ceiling Heights & Door Headers: Raise doorway headers to a uniform height to allow light to flow across rooms.
- Coordinate Lighting Color Temperatures: Keep all LED ambient lighting within a consistent 2700K–3000K range to avoid visual clash between spaces.
Mapping every room renovation plan simultaneously creates an open, elegant home environment.
Set a Realistic Whole House Renovation Budget
Establishing an accurate whole house renovation budget requires accounting for indirect expenses that standard estimate sheets often omit.
When calculating your overall whole home renovation cost, distribute your funds according to this realistic allocation guide:
TYPICAL BUDGET DISTRIBUTION +-----------------------------------------------------------+ | [40%] Kitchen & Primary Bathrooms | +-----------------------------------------------------------+ | [25%] Mechanical, Electrical, Plumbing & Drywall | +-----------------------------------------------------------+ | [20%] Flooring, Architectural Trim & Interior Doors | +-----------------------------------------------------------+ | [15%] Reserve Contingency Buffer (Unforeseen Conditions) | +-----------------------------------------------------------+
- Contractor & Trade Labor: Typically represents 50% to 60% of total project expenditure.
- Permitting & Engineering Fees: Allocate 3% to 5% for municipal approvals and structural sign-offs.
- Contingency Buffer: Always hold back a strict 15% to 20% reserve to handle hidden structural or plumbing updates behind existing walls.
Managing your renovation budget with built-in buffers prevents financial stress mid-project.
Choose What to Keep, Replace, or Redesign
“Do I really need to replace everything?”
Complete gut renovations are not always necessary. Smart remodel planning involves auditing existing home elements to preserve structural character while upgrading functional capacity.
- Keep & Refinish: Solid hardwood flooring, original brickwork, load-bearing timber framing, and high-quality vintage masonry. Refinishing existing hardwood costs a fraction of full replacement while keeping built-in character.
- Replace & Upgrade: Single-pane windows, outdated electrical wiring, hollow-core doors, and galvanized plumbing lines.
- Redesign & Reconfigure: Awkward pantry closets, non-load-bearing partition walls, and dark hallway entryways.
Strategic house remodeling ideas focus your budget where it delivers maximum impact while preserving valuable existing assets without losing architectural character.
Plan the New Layout Before Renovating
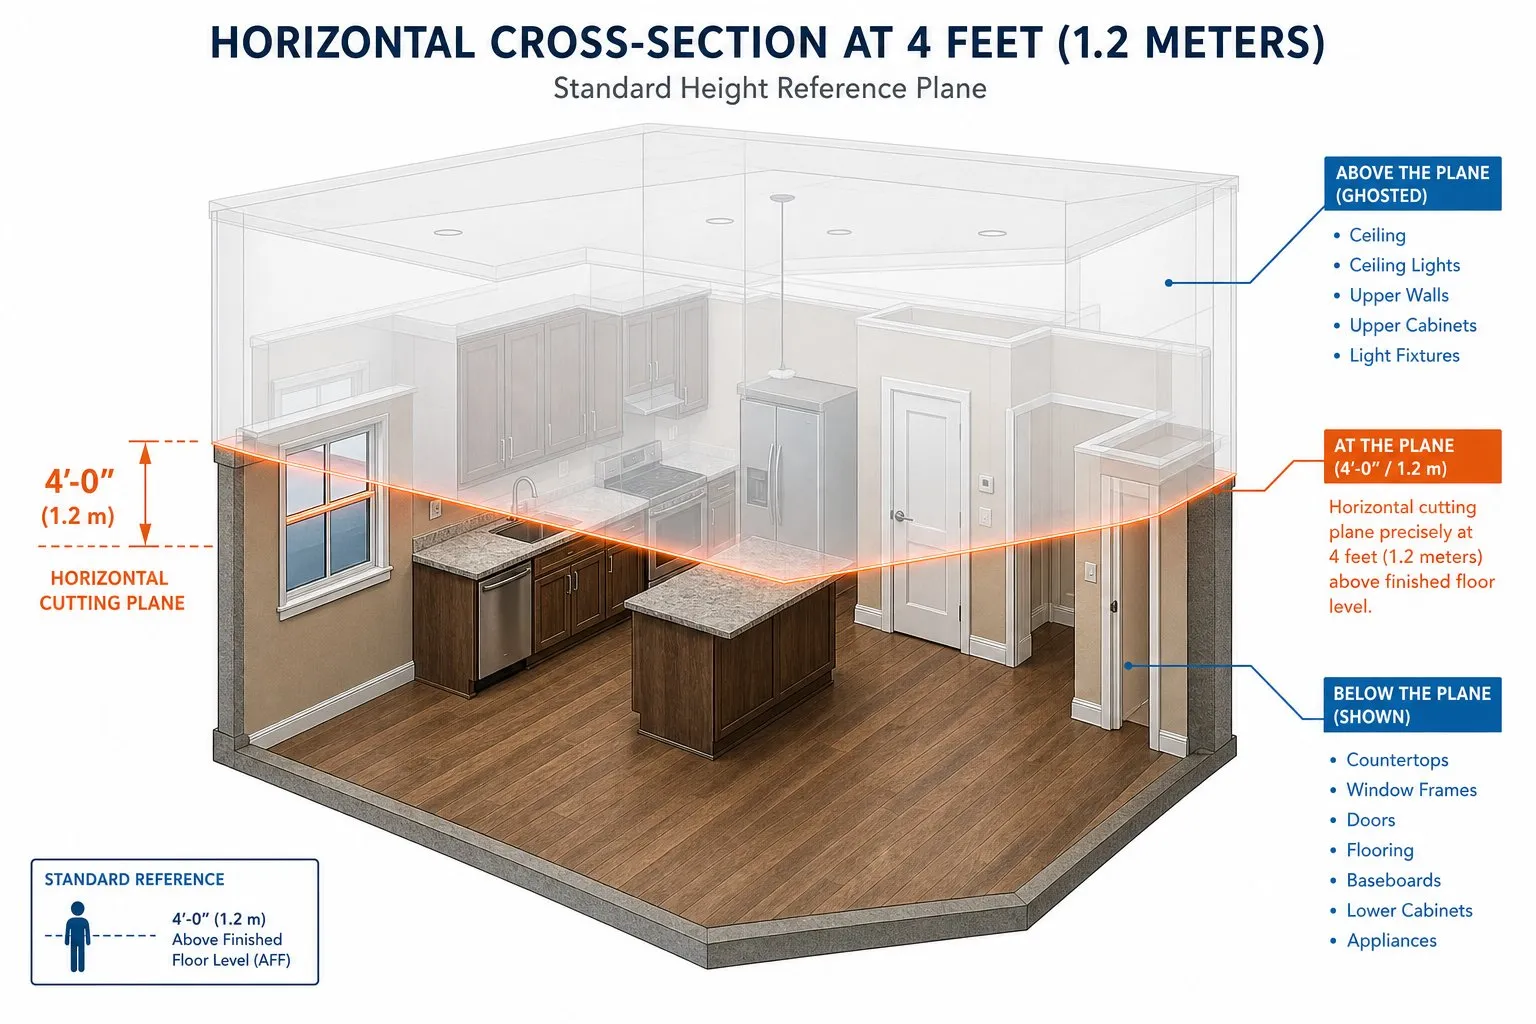
Finalizing a renovation floor plan before starting demolition prevents layout regrets and expensive mid-construction change orders.
CLEAR TRAFFIC CLEARANCE STANDARDS +-----------------------------------------------------------+ | [KITCHEN ISLAND] | | | | | |<----- 42" KITCHEN WORK AISLE ----->| | | | | | [PERIMETER CABINETS] | | | | <=================== 36" MAIN HALLWAY WALKWAY ==========>| +-----------------------------------------------------------+
When refining your house renovation floor plan:
- Maintain 36-Inch Main Walkways: Ensure hallways and pathways between furniture clusters remain at least 36 inches wide.
- Verify Kitchen Work Triangle Clearances: Maintain 42 to 48 inches between kitchen islands and surrounding countertops to allow two cooks to work comfortably.
- Optimize Door Swing Arcs: Ensure interior doors open against blank walls rather than blocking cabinet drawers or light switches.
A well-tested remodel floor plan guarantees natural movement throughout your renovated space.
Create a Look That Works Throughout the House
Achieving a polished whole house interior design requires establishing a continuous baseline palette before adding individual room accents.
Apply these core principles for cohesive whole home design:
- Continuous Flooring Materials: Extend the same primary hardwood, engineered plank, or tile across main living areas, hallways, and kitchens to create an unbroken floor plane.
- Unified Paint Undertones: Select one primary neutral color (warm white, pale greige, or soft cream) for 70% of your walls, reserving bolder colors for enclosed bedrooms or powder rooms.
- Matched Metal Finishes: Limit hardware and fixture metals to two complementary finishes (e.g., matte black hardware with brushed brass light fixtures) throughout the house.
Consistent home renovation design guidelines prevent your home from feeling disjointed.
Choose Materials and Finishes Without Getting Overwhelmed
Navigating thousands of tile samples, countertop slabs, and cabinet styles can lead to decision fatigue.
Select your renovation materials systematically using a hierarchical approach:
- Anchor Finish (First Selection): Choose your primary kitchen countertop or main flooring material first. This serves as the anchor for all subsequent choices.
- Secondary Finishes: Pair cabinet colors and wall tile directly with the undertones of your anchor material.
- Accent Finishes (Final Selection): Select cabinet hardware, light fixtures, and wall paint to complement your main selections.
MATERIAL SELECTION HIERARCHY [ ANCHOR SELECTION ] ---> Main flooring or kitchen countertop slab +-------------------------+ | | | [ SECONDARY FINISHES ] ---> Cabinetry stain, wall tile & vanity surfaces | | +-------------------------+ [ ACCENT SELECTION ] ---> Hardware pulls, plumbing fixtures & paint tones
Structuring your home renovation finishes workflow keeps choices manageable and aligned with your budget.
Visualize the Renovated Home Before Spending Money
Committing to major structural demolition based on 2D line drawings or mental guesswork is risky. Visualizing the renovated home before spending money on materials using advanced home renovation design software allows you to test visual flow and proportion.
Key benefits of using a digital renovation planner:
- Test open-concept wall removals under realistic lighting conditions.
- Compare kitchen island placements and verify seating clearances down to the inch.
- Preview how different flooring choices and cabinet colors look together across adjoining rooms.
Using specialized whole house design software ensures total design confidence before construction starts.

Turn Your Renovation Ideas Into One Complete Plan
Consolidating your ideas into a single complete home renovation plan turns scattered inspiration into an actionable guide for your build team.
Your final house remodel planner dossier should include:
- Dimensioned Floor Plans: Showing wall removal, new partition walls, and lighting placements.
- Material Specification Sheets: Listing exact model numbers, paint codes, tile sizes, and hardware finishes.
- Construction Schedule: Mapping trade sequences from initial demolition through electrical rough-in to final paint.
Compiling a clear whole house renovation plan minimizes contractor questions and keeps work moving smoothly.
Know What Your Finished Home Should Look Like Before You Begin
A successful whole-house transformation requires an accurate design roadmap. Traditional planning method—hiring separate architects, interior designers, and drafting technicians—can be slow, expensive, and difficult to coordinate.
Now, you can test your master floor plan using our spatial intelligence system. DesignHome Synthesis™ streamlines this process into an intuitive digital experience.
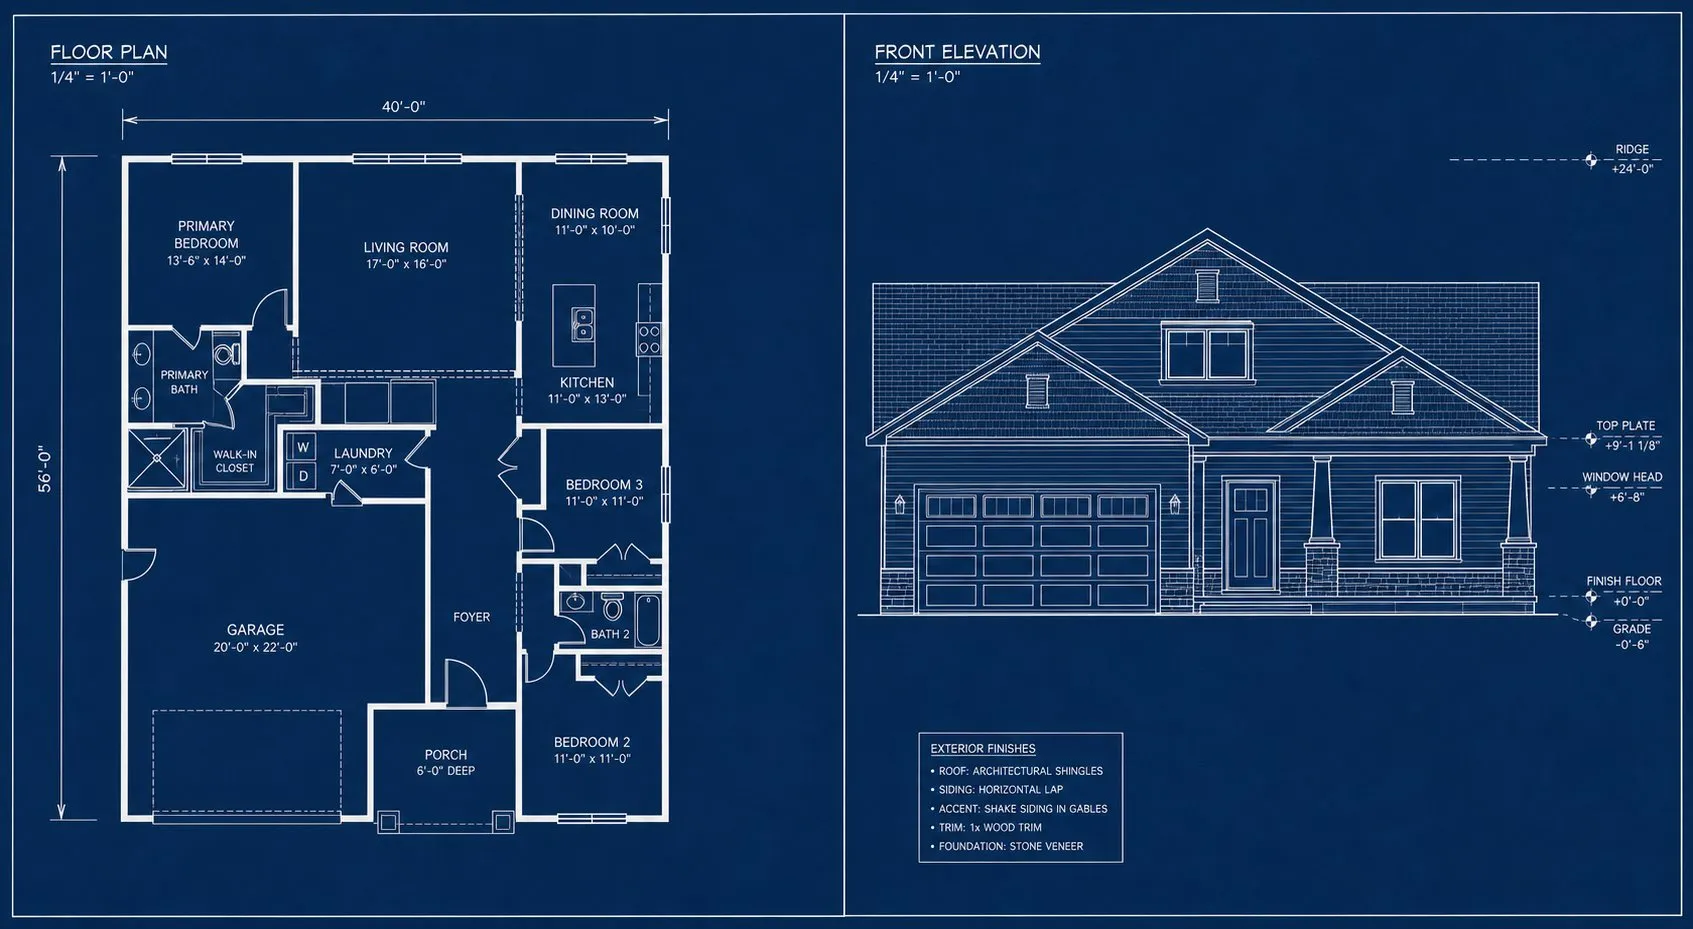
As a spatial intelligence system trained on global architectural floor plans, DesignHome Synthesis™ transforms your vision into a complete design package:
- Step 1: Define Your Footprint: Enter your plot or home dimensions, specify household size, and select your target room count.
- Step 2: Share Your Bold Vision: Describe your preferred architectural style, layout preferences, and functional needs—then click generate.
- Step 3: Review Complete 3D Visualizations: Instantly receive an optimized master renovation floor plan, realistic exterior architecture renders, and detailed interior design visualizations.
Previewing your full home design in photorealistic 3D gives you the clarity to begin your renovation with total confidence.
Whole House Renovation Planning FAQ
Where do I even start when planning a whole house renovation?
Systematic renovation planning begins with a comprehensive functional audit of your home rather than picking out cosmetic finishes. Your opening move is conducting a room-by-room assessment that separates critical structural, mechanical, and safety updates—such as an aging roof, outdated electrical panels, or compromised plumbing—from decorative changes. Once you document these foundational priorities, establish a clear scope of work detailing your daily lifestyle friction points and maximum financial threshold. Drafting this written scope before engaging architects or contractors prevents scope creep, protects your cash reserves, and ensures every design choice directly solves a specific spatial or structural problem in your daily life.
What is the correct order of steps so I don't ruin new work?
A successful whole house remodel follows a strict physical hierarchy where heavy structural work precedes fine interior finish work. Construction begins with structural modifications and demolition, moving directly into framing adjustments, exterior envelope work (roofing, windows, siding), and mechanical rough-ins—covering electrical, plumbing, and HVAC systems. Only after municipal building inspectors approve these concealed mechanics do contractors install insulation and drywall. Finishes proceed top-to-bottom and inside-out: prime painting, tile installation, custom cabinetry, countertop fitting, and trim carpentry, concluding with final floor sanding and light fixture installation to ensure expensive surface materials are never damaged by heavy trade work.
How much should I realistically expect to spend per square foot?
Full-home remodels generally range from $100 to $300+ per square foot, depending on regional trade labor rates, structural complexity, and chosen finish grades. A basic cosmetic update involving fresh paint, refinished floors, stock cabinetry, and surface-level fixtures sits on the lower end of this range, whereas complete gut renovations requiring foundation underpinning, structural wall removals, layout reconfigurations, and custom millwork reach the upper boundary. High-water spaces—specifically kitchens and primary bathrooms—command the highest investment concentration per square foot due to dense plumbing lines, electrical wiring, waterproofing, cabinetry, and stone fabrication.
How long is my life going to be disrupted by a full renovation?
A comprehensive multi-room or whole-house remodel typically requires 7 to 15 months from initial architectural drafting through the final walkthrough. This timeframe divides into two distinct stages: pre-construction planning (lasting 3 to 5 months) and active physical construction (spanning 4 to 10 months). Pre-construction involves architectural design, structural engineering, material lead-time sourcing, contractor bidding, and municipal permit processing. Active construction time fluctuates based on structural additions, weather conditions, and trade availability. Complex projects involving structural footings or historic preservation frequently push toward 18 months, making early layout locking vital to maintaining momentum.
Should I hire an architect, an interior designer, or a design-build firm?
Selecting project leadership depends on whether your project alters structural footings or reconfigures interior finishes. If your renovation involves moving load-bearing walls, expanding the exterior footprint, or altering rooflines, a licensed architect or structural engineer is legally required to stamp permit drawings. If your scope centers on interior floor plans, cabinetry design, material specifications, and spatial flow without major exterior modifications, an interior designer offers specialized guidance. For homeowners seeking a single point of operational accountability, a design-build firm merges architectural design, material ordering, and general contracting under one contract, reducing communication friction and keeping budget estimates aligned with actual trade costs during drafting.
How do I build a budget that actually stops cost overruns?
Creating a resilient renovation budget requires dividing your capital into three distinct buckets: hard construction bids, professional design fees, and an untouchable contingency reserve. Never allocate 100% of your available funds to initial contractor bids; reserve 15% to 20% of your total liquid budget exclusively for your contingency fund to absorb unexpected hidden issues behind walls. Secure fixed-price contracts rather than time-and-materials agreements whenever possible, and finalize every finish choice—down to door hardware and plumbing valves—before breaking ground. Deciding on every detail early eliminates mid-project change orders, which carry heavy contractor administration fees and scheduling delays.
Is it cheaper to renovate the entire house all at once or in phases?
Executing a full home renovation in a single continuous phase is substantially cheaper per square foot and faster than splitting the work over several years. Single-phase construction allows general contractors to schedule trade subcontractors efficiently, negotiate bulk material volume pricing, pull a single master permit, and complete messy drywall, framing, and mechanical work all at once. Phasing a project across multiple years extends daily living disruption, requires contractors to set up job site protection multiple times, and forces tradespeople to work repeatedly around lived-in spaces. If financial constraints dictate a phased renovation approach when budgets are tight, group all structural and utility infrastructure into Phase 1, follow with wet spaces, and finish with dry cosmetic rooms.
Can I stay in the house during construction to save on rent?
Living on-site during a major full-house gut renovation is rarely advisable and often financially counterproductive. Beyond severe health concerns surrounding drywall dust, VOC emissions, persistent noise, and potential lead or asbestos hazards in older homes, remaining in the house forces contractors to adapt their work schedule around your family routine. Subcontractors must maintain temporary working plumbing, construct sealed dust barriers, and clean up job site safety hazards every single afternoon—adding labor hours and extending the overall build schedule. Moving to temporary rental accommodations allows trades to cut power, remove walls, and run plumbing lines without delay, saving you money on extended construction labor.
Do I really need permits for internal wall changes and plumbing?
Navigating municipal building requirements mandates securing formal permits before demolition begins to prevent costly stop-work orders or title issues during future property sales. Any project modifying load-bearing framing, electrical circuits, gas lines, plumbing stacks, or exterior building envelopes requires municipal review. Your general contractor or architect submits technical construction drawings to the local building department, where plans undergo structural, fire, and zoning compliance checks. Ensure your contract explicitly states that the general contractor is responsible for pulling all required master and trade permits, coordinating municipal milestone inspections, and securing the final Certificate of Occupancy upon completion.
How do I choose a general contractor without getting burned?
Vetting general contractors requires a disciplined selection process that goes far beyond comparing initial bid prices. Request written estimates from at least three licensed and insured contractors using identical architectural plans and finish schedules to ensure direct scope comparability. Verify active general liability and worker’s compensation coverage directly with their insurance agent, call at least three recent client references to ask about timeline discipline and budget adherence, and visit an active job site to inspect site cleanliness and trade safety. Avoid contractors who require large upfront cash deposits before job site delivery or who suggest working without municipal permits.
What hidden repair surprises usually wreck a renovation budget?
Hidden costs routinely surface the moment walls are opened and subfloors are exposed. Common unexpected structural expenses include outdated knob-and-tube wiring, corroded galvanized steel plumbing, unlevel subfloors, termite damage inside framing, hidden rot, and unpermitted historical work. Beyond the physical building structure, homeowners often overlook secondary operational costs such as temporary utility connections, dumpster overage fees, site portable toilet rentals, architectural revision fees, municipal permit surcharges, and long-term storage fees for existing furniture. Factoring these operational line items into your initial budget calculation prevents panic when unexpected site conditions emerge.
How can I test layout ideas before spending money on real construction?
Testing spatial flow and furniture clearances digitally eliminates expensive mid-construction floor plan revisions and change orders. Trying to evaluate 3D space using flat paper blueprints often leads to misjudged room scales, tight traffic pathways, and poorly placed lighting fixtures. Utilizing advanced 3D spatial design software allows you to build a digital twin of your floor plan, test removing non-load-bearing walls, model open-concept transitions, check door swing radii, and assess natural light shifts throughout the day. Validating your layout visually ensures every wall placement, hallway width, and cabinetry run matches your daily routine before signing construction contracts.


