

You stand in your kitchen looking at faded cabinet faces, tired wall paint, and lighting that leaves dark shadows across your countertops.
You know the room needs a fresh look, but the thought of a full demolition—living with dust for months, eating takeout, and watching contractor bills pile up—feels completely unappealing. You step back and ask: Can I actually turn this into a bright, contemporary space without tearing anything out?
The answer is a resounding yes.
Refreshing a kitchen isn't about replacing every fixture down to the wall studs. By making targeted visual updates, changing high-impact details, and coordinating your existing finishes, you can update a kitchen without remodeling and achieve a dramatic transformation at a fraction of the cost. For a deeper refresh that skips structural demolition entirely, see our whole-home refresh playbook that skips structural demo. Here is how to plan, prioritize, and execute your low-demolition kitchen refresh step by step.
1. How to Update a Kitchen Without Remodeling or Replacing Everything
The secret to a successful low-renovation refresh is identifying where your effort will yield the highest visual return.
Most outdated kitchens don't suffer from broken structures; they suffer from aged finishes, dim lighting, and tired color schemes.
= High Cost
= Fast Results
Before spending money on paint swatches or hardware, establish these core refresh guidelines:
- Protect What Works: If your cabinet boxes are structurally sound and your floor plan functions well, keep the core layout intact to save thousands in trade labor.
- Target Eye-Level Features: Focus your budget on elements that catch the eye immediately upon entering—such as cabinet door faces, hardware pulls, backsplash surfaces, and light fixtures.
- Build a Cohesive Palette: Coordinate new paint and metal finishes around expensive elements you plan to keep, such as stone countertops or hardwood floors.
2. Identify the Kitchen Features That Make It Look Dated
When a room feels tired, homeowners often assume everything needs to be replaced. In reality, two or three specific features are usually responsible for dragging down the entire space.
Pinpointing these specific visual anchors allows you to focus your budget where it matters most.
Run a quick 3-point diagnostic pass across your space:
- Examine your cabinet finishes: Is yellowed varnish, orange oak grain, or chipped paint dominating the room's visual background?
- Audit hardware scale: Are your cabinet knobs tiny, dated, or mismatched against modern appliances?
- Evaluate light distribution: Does your ceiling fixture leave deep, dark shadows over your main prep counters?
3. Refresh Kitchen Cabinets Without Replacing Them
Cabinetry occupies up to 70% of the visible wall area in a kitchen. Giving your existing door fronts a fresh surface treatment delivers the single biggest visual payoff of any budget project.
When evaluating how to update kitchen cabinets without replacing them, choose a method that matches your cabinet's material and your available time. For coordinating door tones with your wall palette, see our cabinet finish selection guide for modern low-demo updates.
- Uses wood cleaner & feed-wax
- Preserves natural wood grain
- Requires degreasing, sanding & bonding primer
- Delivers a factory-smooth satin finish
Cabinet refresh strategies:
- Deep Clean and Re-Wax: If you have quality solid wood doors, scrub away grease using a dedicated wood cleaner, then apply a furniture feed-wax to restore richness without painting.
- Apply Cabinet-Grade Urethane Enamel: For a complete color shift, degrease doors thoroughly, apply a high-adhesion bonding primer, and finish with two coats of durable satin cabinet enamel.
- Remove Select Upper Doors: Convert one or two upper cabinet sections into open display shelving by removing the doors, filling the hinge holes, and painting the interior cabinet boxes in a contrasting accent shade.
4. Change Kitchen Cabinet Handles for a Noticeable Style Update
Swapping old, tarnished drawer knobs for sleek, modern hardware is one of the fastest ways to modernize your space.
To execute a seamless handle replacement, measure the distance between the screw holes on your existing handles before buying new ones.
Hardware replacement guidelines:
- Match Center-to-Center Hole Spacing: Measure the exact distance between the center points of the two screw holes on your current handles (common standard sizes are 3 inches, 3.75 inches, or 128mm). Buying matching sizes eliminates the need to drill new holes.
- Cover Old Footprints with Backplates: If old knobs left indented rings on your cabinet doors, install hardware pulls with decorative backplates to conceal cabinet marks seamlessly.
- Scale Pulls to Drawer Widths: Use longer bar pulls on wide, deep lower drawers to create a balanced, high-end look.
5. Give the Kitchen Walls and Backsplash a Fresh Look
Your wall paint and backsplash tile form the visual backdrop for all your cabinets and counters. If these surfaces are discolored or feature dated patterns, the whole room feels tired.
Updating these surfaces creates an immediate boost in brightness and contrast.
- Repairing damaged wall backing
- Installing new stone mosaic slab
- Painting existing tile with specialized tile enamel
- Applying warm, light-reflecting wall paint
Backdrop refresh tactics:
- Refresh Discolored Grout: Scrub stained tile grout lines with a dedicated grout cleaner, or use an acrylic grout colorant pen to turn dark, dingy grout lines bright white or soft gray.
- Paint Tired Backsplash Tiles: Clean ceramic tiles with a degreaser, apply an extreme-adhesion tile primer, and paint with a durable satin tile enamel for a clean, uniform look.
- Repaint Perimeter Walls in Light Neutrals: Use warm off-white or soft greige wall paint in a washable satin finish to bounce natural light across work surfaces.
For technical guidelines on low-VOC paint standards, surface prep safety, and non-toxic wall finishes, consult the Sustainable Furnishings Council (SFC).
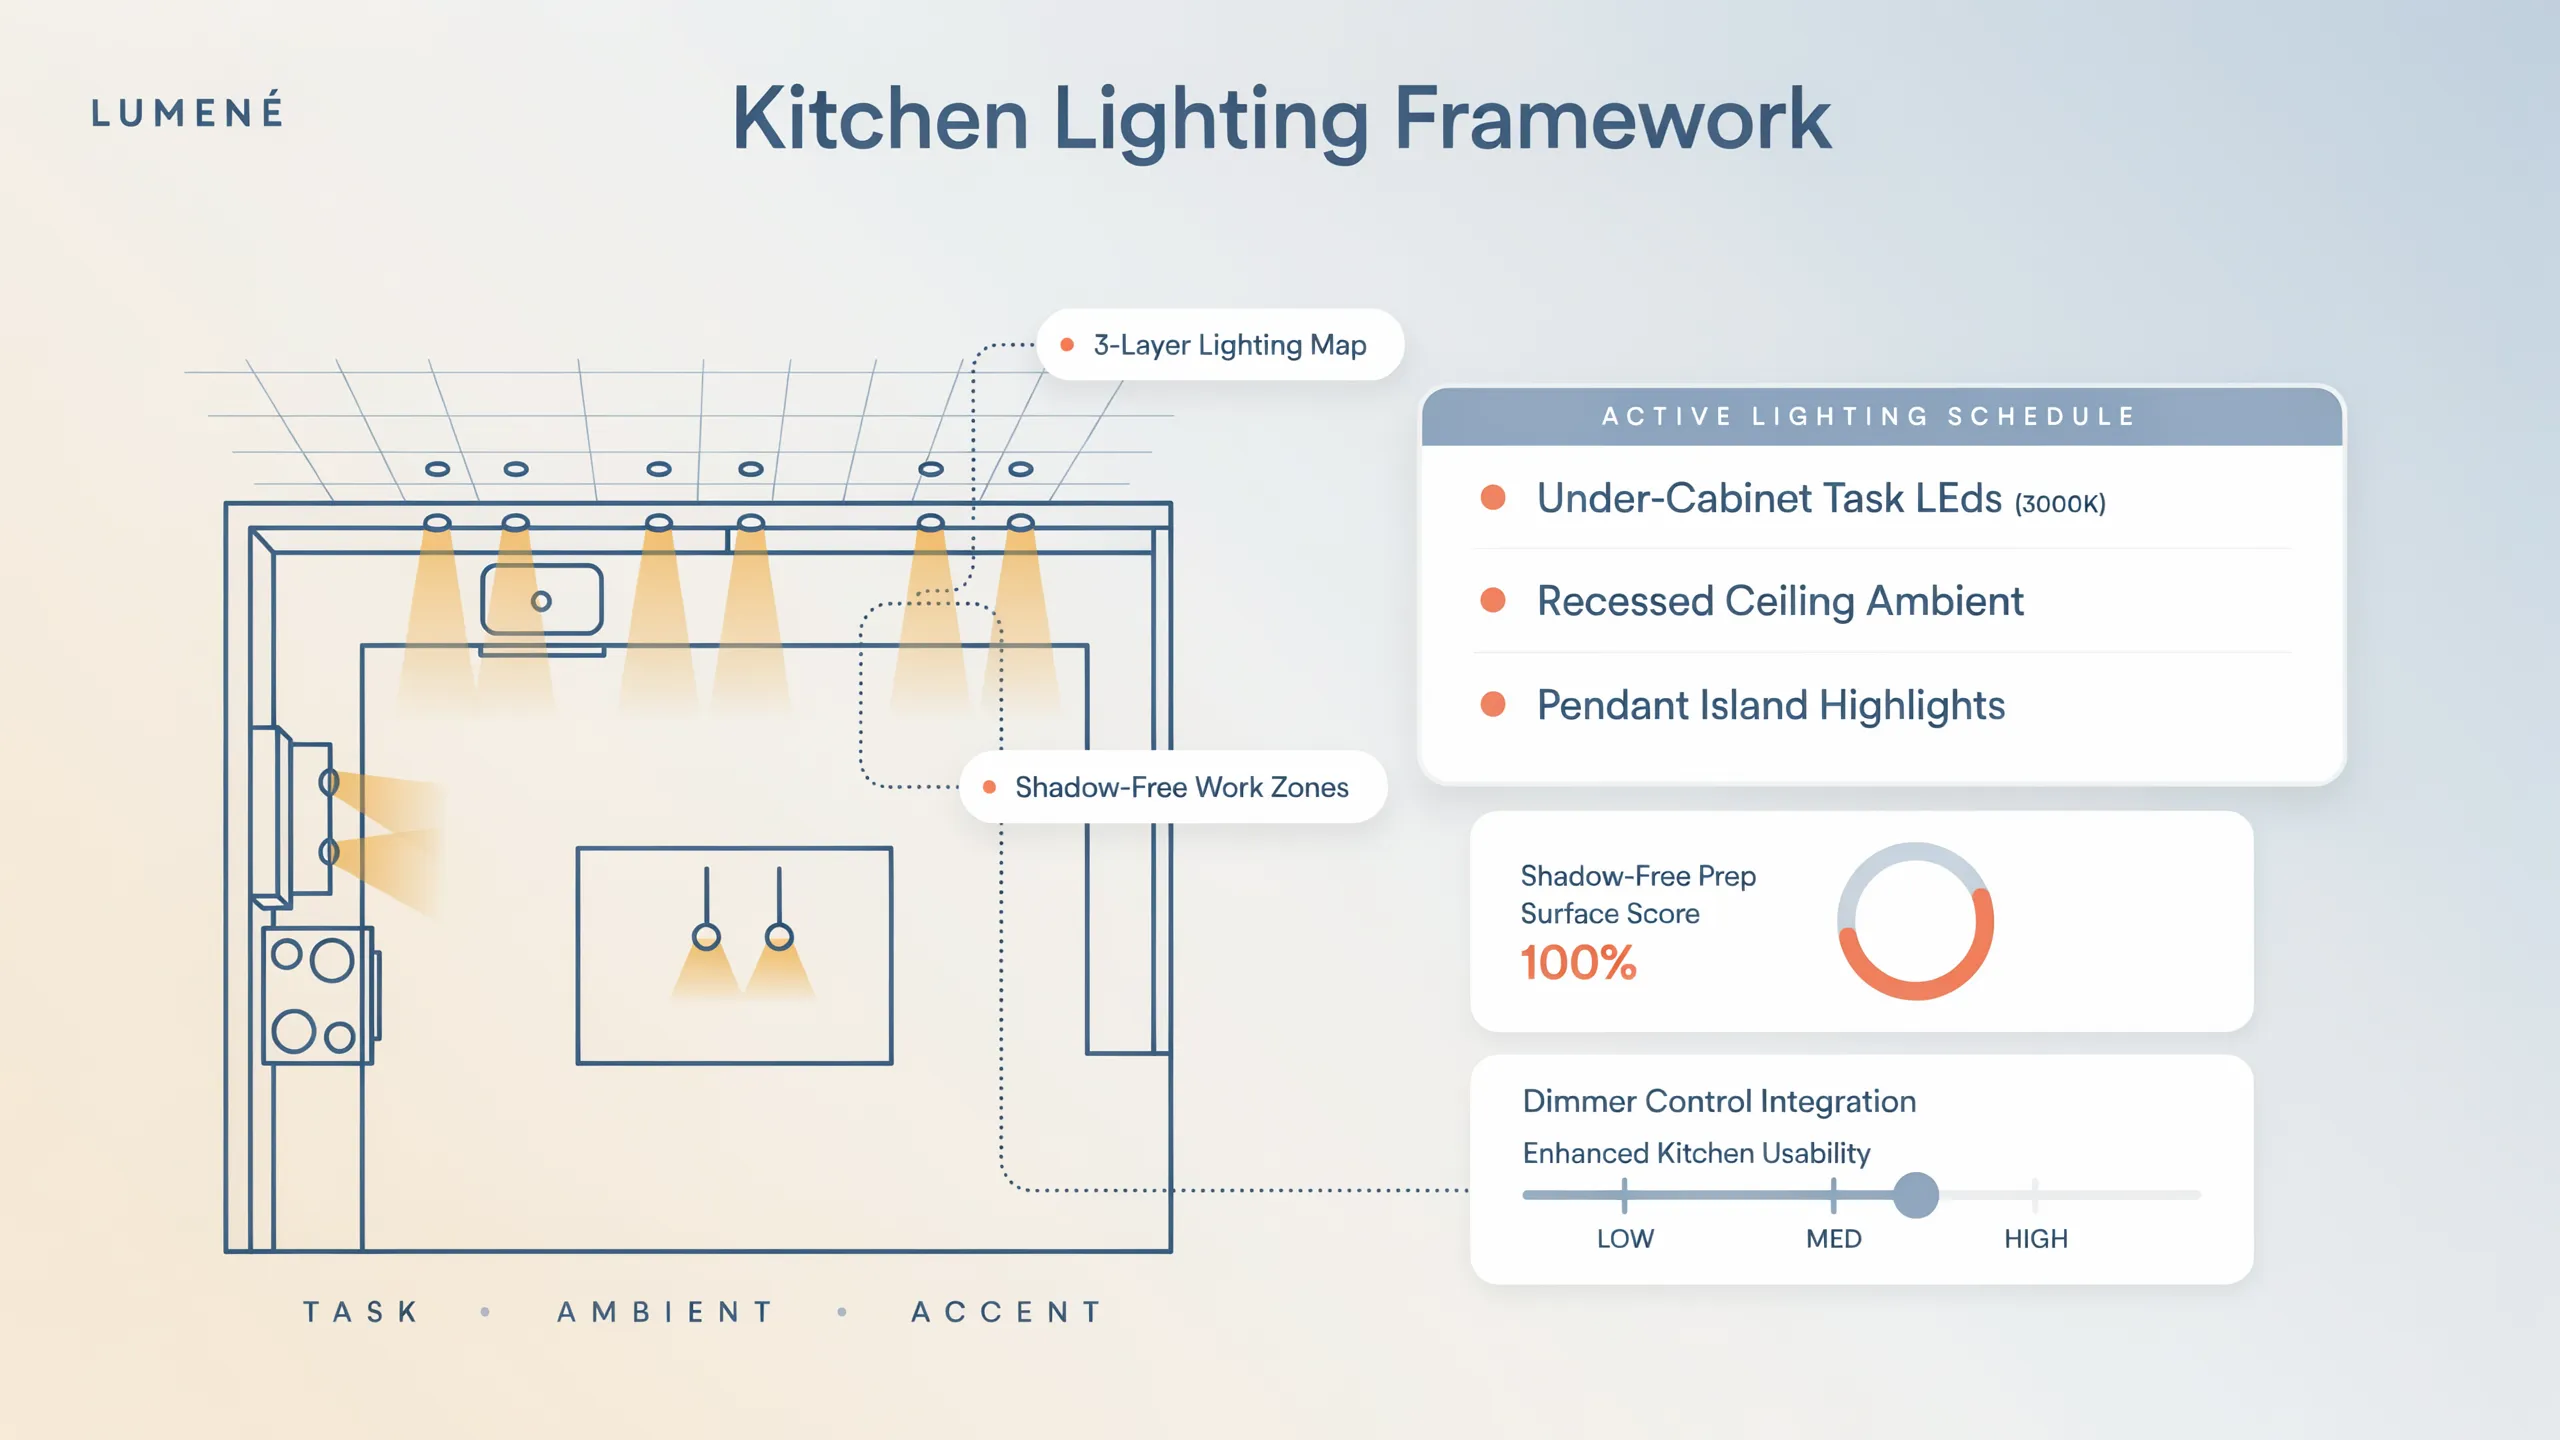
6. Update Kitchen Lighting to Change the Whole Atmosphere
A clean, beautifully updated room will still look flat and uninviting if it is lit by a single, harsh ceiling bulb that casts shadows across your work surfaces.
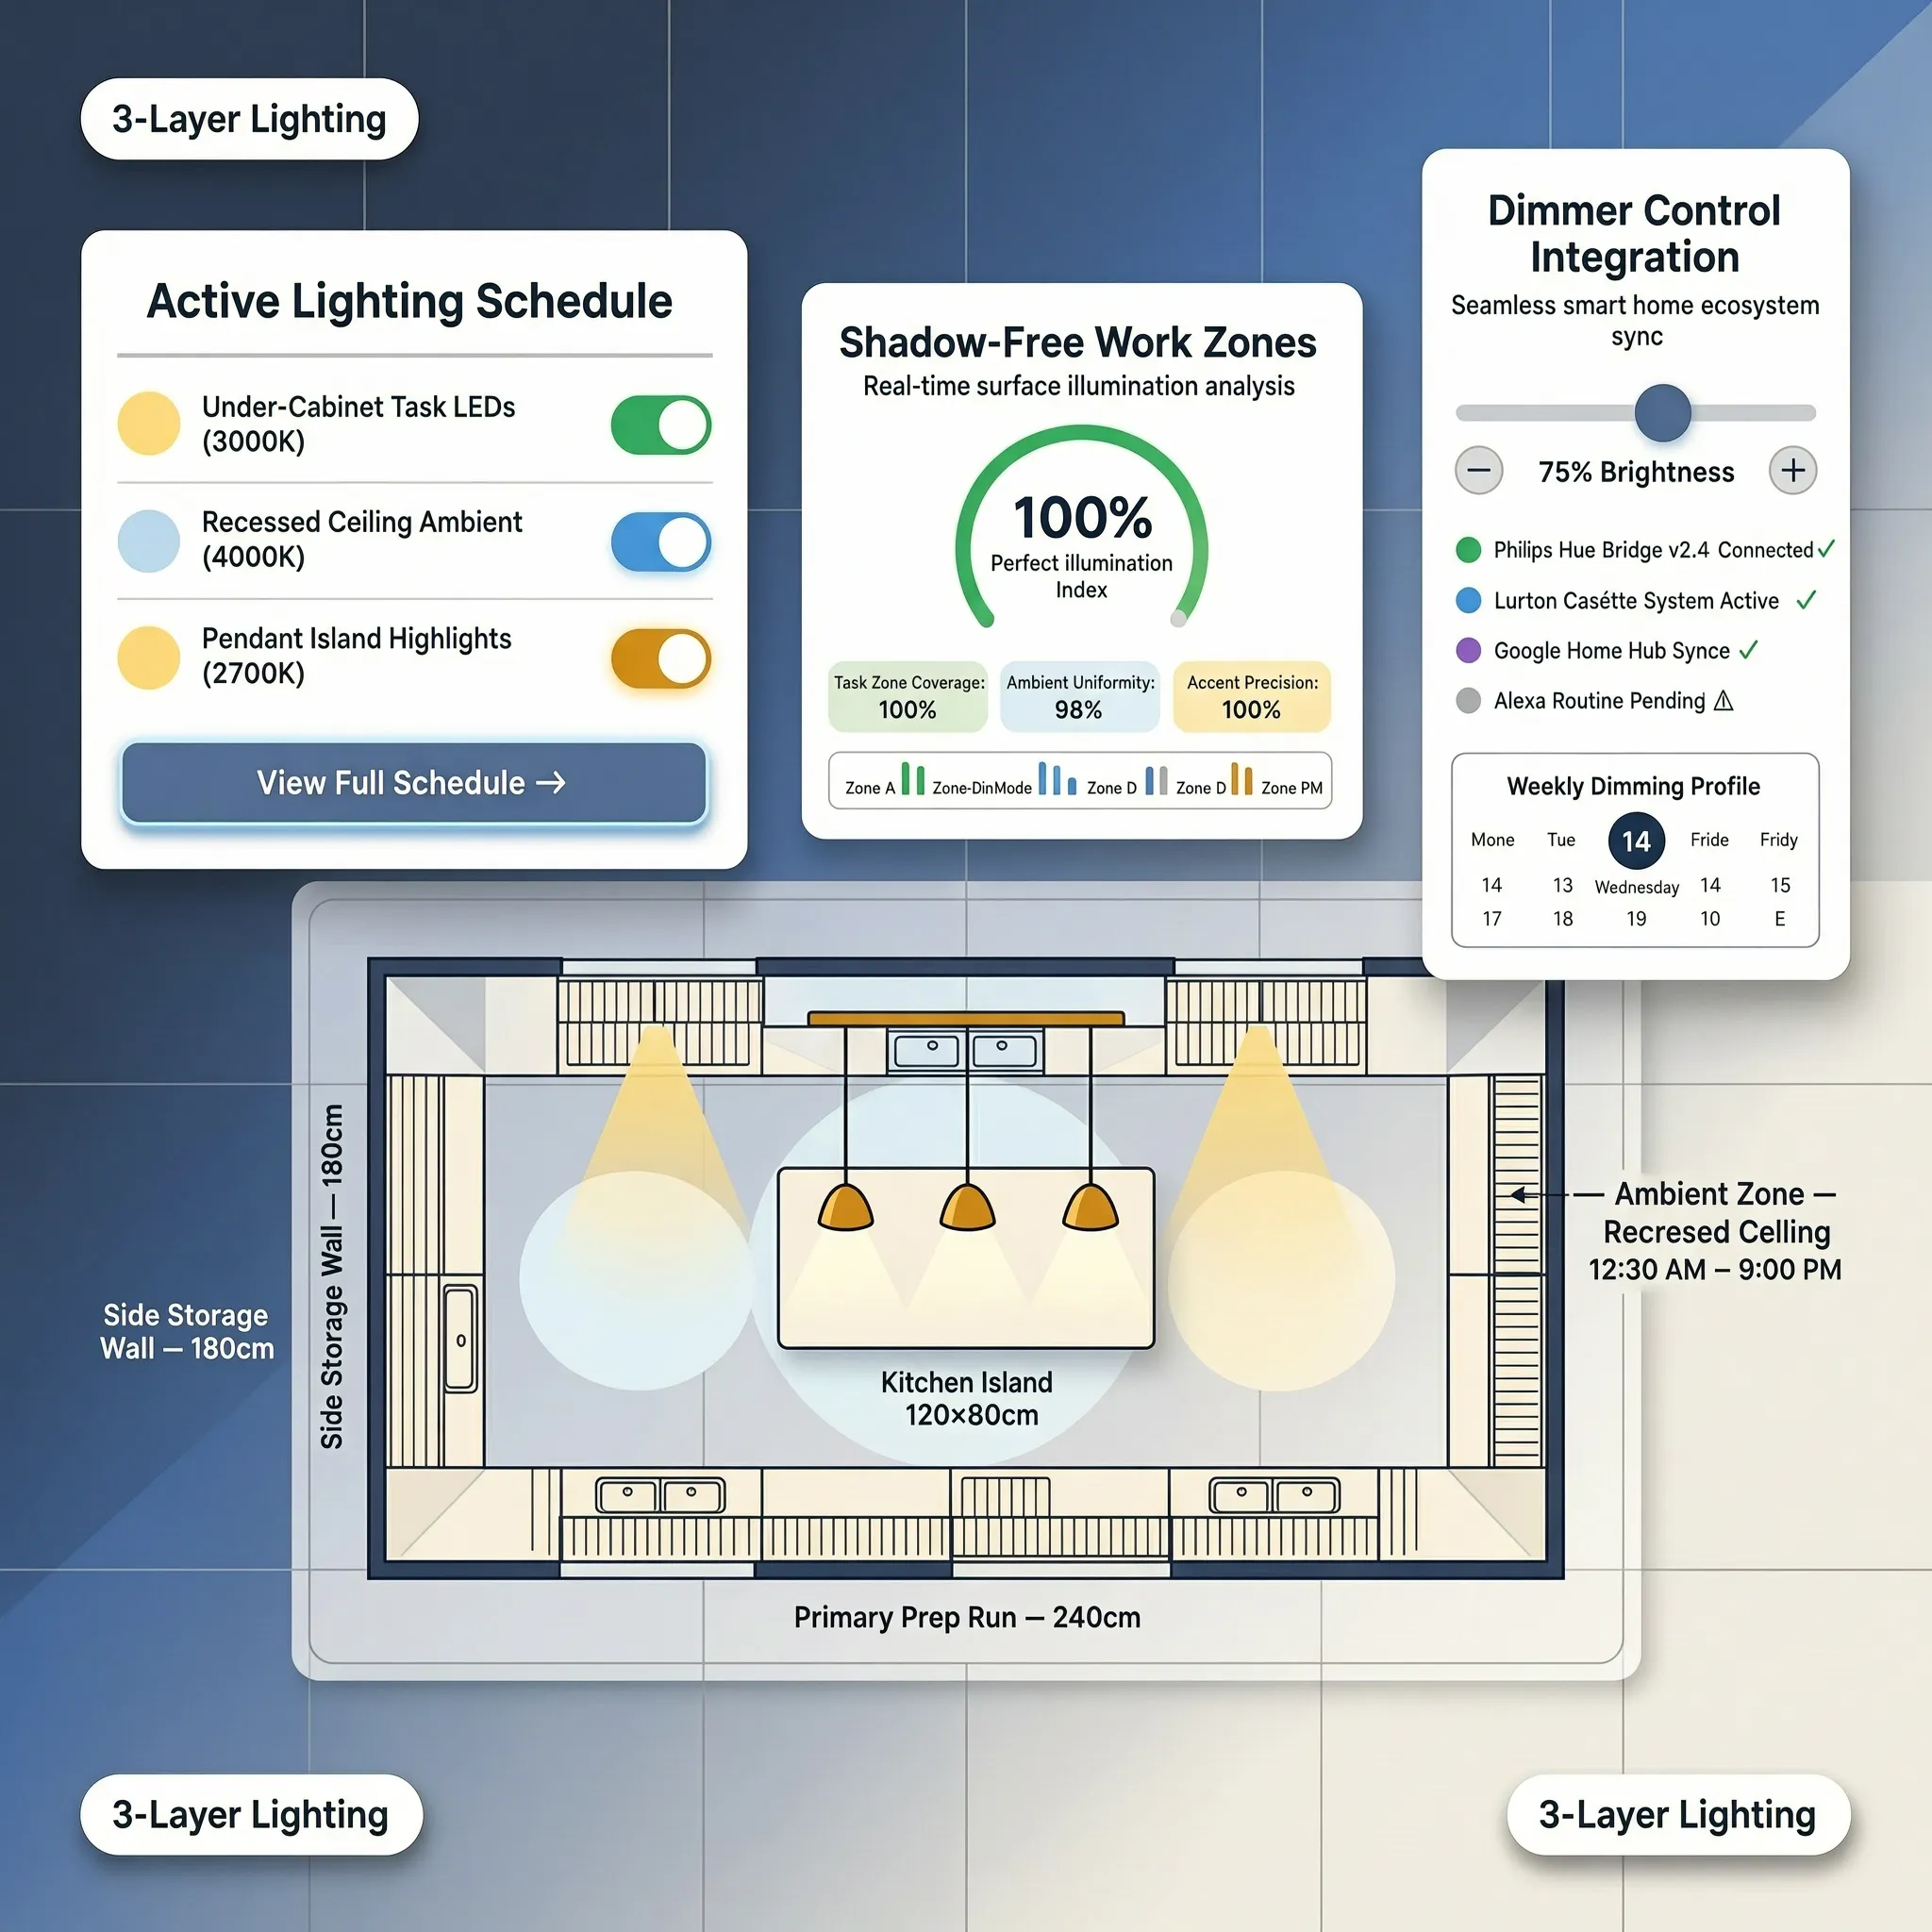
Upgrading your lighting plan is essential to eliminate dark corners and create an inviting mood. For a deeper dive into fixture layering, read our layered lighting plan for shadow-free counters.
  [ Overhead Layer ] ===> Replace dated center glass globe with a modern flush-mount fixture
                                                     |
  [ Task Layer     ] ===> Install continuous under-cabinet LED tape lighting (2700K–3000K)
                                                     |
  [ Accent Layer   ] ===> Add plug-in wall sconces over open shelving or window sink areas
Lighting upgrade rules:
- Add Under-Cabinet LED Strips: Mount continuous LED tape lights beneath upper cabinets to flood prep counters with shadow-free light. Choose warm-white LEDs strictly rated between 2700K and 3000K (Kelvin).
- Swap the Central Ceiling Fixture: Replace an outdated center globe with a semi-flush mount fixture or a multi-directional track head that directs light toward dark corners.
- Upgrade to High-CRI Bulbs: Choose LED bulbs with a High Color Rendering Index (CRI 90+) so fresh produce, countertops, and cabinet paint colors look vibrant and natural.
For official technical standards on residential lighting safety and glare prevention, consult the Illuminating Engineering Society (IES).
7. Make Old Countertops Look Better Without Replacing Them
Replacing stone or solid-surface countertops is often the most expensive line item in a kitchen budget. Fortunately, you can dramatically improve the look of worn worktops without replacing them.
A combination of deep restoration, surface polishing, and smart styling can extend the life of your existing counters for years.
Countertop restoration steps:
- Deep Clean and Re-Seal Natural Stone: Use a pH-neutral stone cleaner to remove built-up film, buff out light surface haze with a stone polishing compound, and apply a fresh penetrating sealer to protect against future stains.
- Sand and Re-Oil Butcher Block: Sand down scratched wooden counters using fine-grit sandpaper, then apply multiple coats of food-safe mineral oil or butcher block conditioner to restore deep wood tones.
- Refinish Worn Laminate: Use an epoxy-based countertop refinishing kit designed specifically to adhere to laminate, creating a durable, solid matte finish.
8. Replace or Restyle Small Kitchen Details for a More Current Look
Sometimes, the smallest details—such as an old, leaky faucet, a worn dish rack, or yellowed outlet covers—send subtle signals that a space is aged.
Replacing these minor elements builds momentum and gives the entire room a crisp, well-maintained feel.
- Yellowed plastic outlet switch covers
- Cluttered countertop dish drying rack
- Clean, screwless white wall plates
- Stainless steel roll-up over-sink rack
Detail refresh checklist:
- Upgrade to a High-Arc Pull-Down Faucet: Replace a low-profile, dated faucet with a modern goose-neck pull-down faucet in brushed brass, matte black, or stainless steel.
- Install Screwless Wall Plates: Swap old, yellowed electrical outlet covers and light switches for clean, screwless white faceplates.
- Update Window Treatments: Replace heavy fabric valances or yellowed plastic blinds with clean woven solar shades or tailored linen Roman blinds that let daylight filter through.
9. Clear Kitchen Counters and Restyle Open Shelves
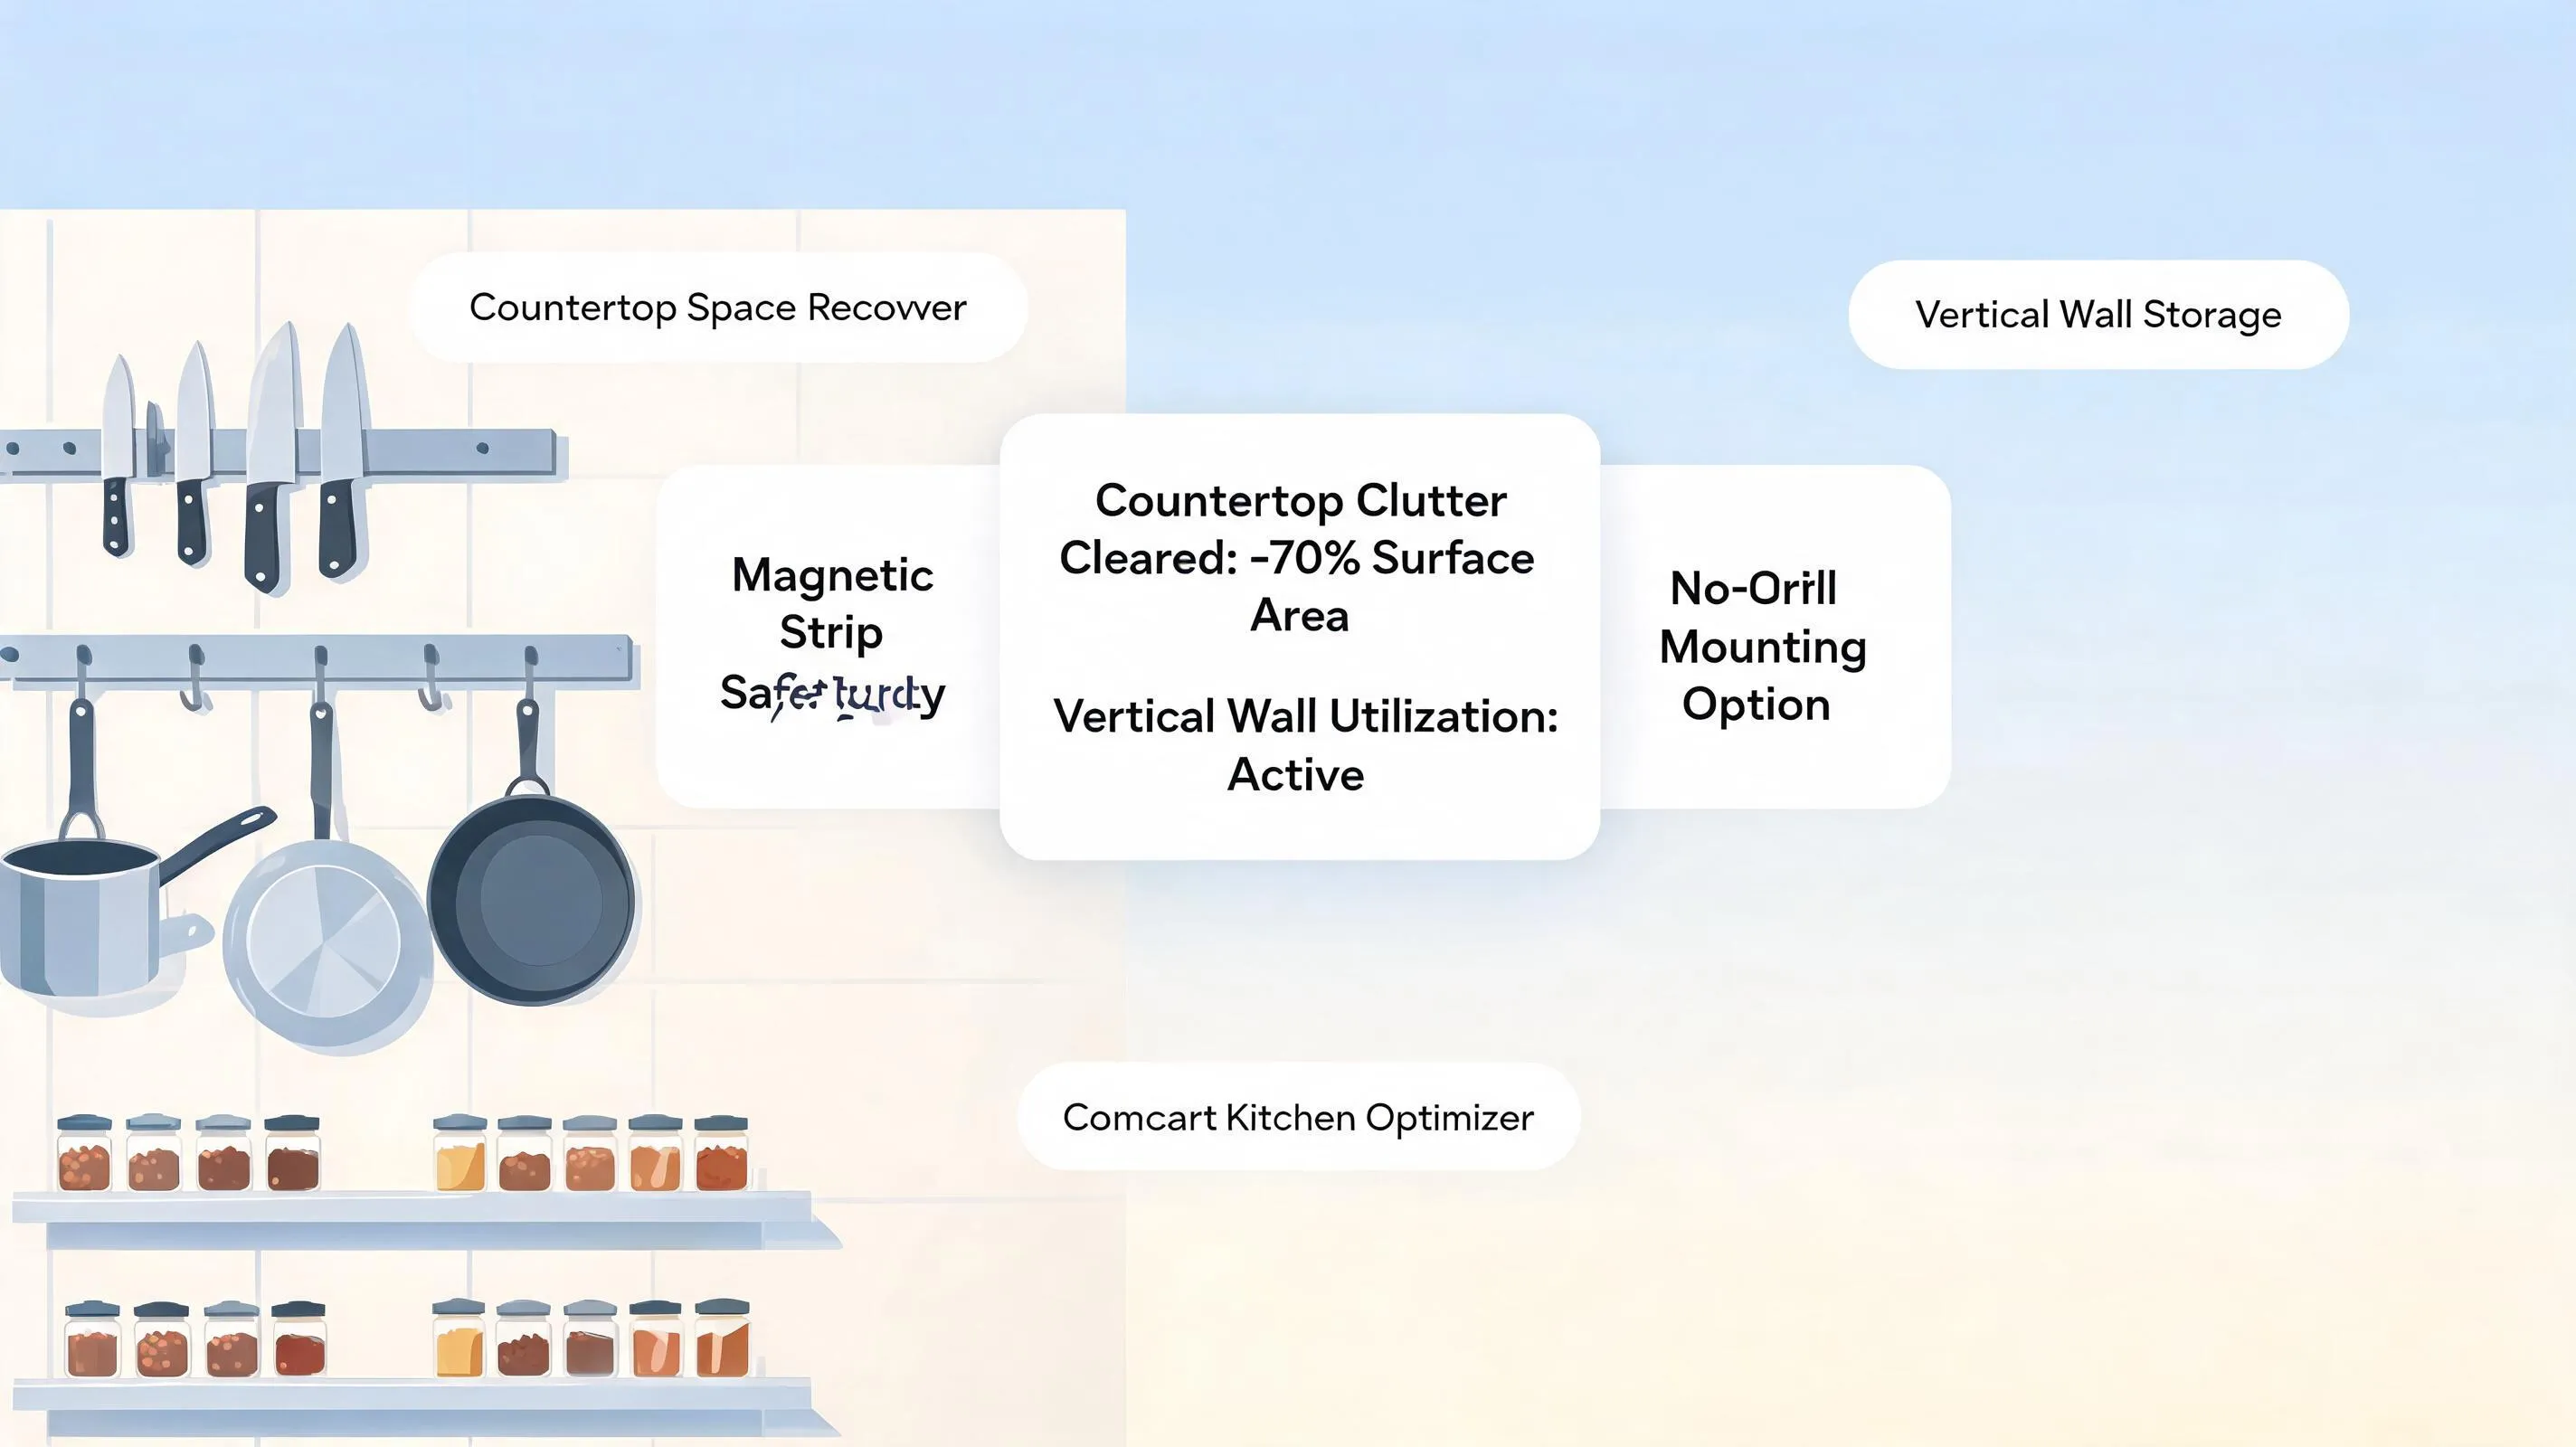
Even if you paint your cabinets and install new lighting, crowded countertops piled with small appliances, mail, and clutter will keep the room looking messy and small.
Restyling visible surfaces focuses on negative space and intentional display. To retrofit interiors for hidden appliance storage, see our roll-out hardware guide for tucking everyday tools out of sight, or for tight footprints, our cabinet interiors optimized for clutter-free counters.
Surface restyling rules:
- Protect the Primary Prep Surface: Keep the main counter space between your sink and stove 100% clear of appliances and mail.
- Use the Rule of Three for Open Shelving: When styling open shelves or display cabinets, group decorative items (like cookbooks, ceramic crocks, and potted herbs) in odd numbers (1, 3, or 5) at varying heights.
- Consolidate Daily Items on Trays: Place daily cooking essentials—like olive oil, sea salt, and pepper grinders—onto a single sleek tray beside the stove to keep the rest of the counter open.
10. Update Kitchen Colors Without Replacing the Cabinets or Floors
If you choose not to paint your cabinets, you can still transform the room's overall color feel by surrounding existing wood or neutral cabinetry with complementary accent shades.
Choosing the right wall paint, runner rugs, and textiles can make older wood tones look intentional, rich, and modern. For specific shade recommendations, see our warm paint palettes that complement existing wood tones.
- Complemented by antique brass hardware
- Softens yellow undertones naturally
- Complemented by warm brass or nickel hardware
- Creates high-contrast, airy sophistication
Color integration rules:
- Balance Golden Wood Tones: If keeping honey oak cabinets, avoid bright blue wall paint, which creates a harsh contrast that makes oak look more orange. Instead, choose soft sage green, warm greige, or pale cream to complement the wood.
- Add Warmth with a Washable Runner Rug: Lay a durable, washable runner rug featuring warm vintage tones along the main walkway corridor. Rugs tie room colors together while protecting high-traffic flooring.
- Coordinate Window and Seat Textiles: Use matching linen fabrics for seat cushions, window shades, and hand towels to create a unified palette across the entire room.
11. Choose Kitchen Updates That Make the Biggest Difference on Your Budget
When refreshing a room on a budget, it is easy to get distracted by minor accessories and run out of funds before addressing high-impact areas.
Prioritizing your project list ensures every dollar goes toward updates that deliver maximum visual transformation. For a broader budget framework, read our budget allocation framework for low-demo refreshes.
Budget allocation strategy:
- Fund Cabinetry and Hardware First: Allocate the largest portion of your budget to refreshing cabinet finishes and purchasing quality hardware pulls.
- Invest in Quality Task Lighting: Prioritize under-cabinet LED lighting over purely decorative accents, as bright counters make the whole room feel larger and cleaner.
- Pace Your Upgrades: Tackle project phases one weekend at a time—starting with cleaning and painting, moving to lighting, and finishing with hardware and accessories.
12. Put Your Kitchen Makeover Plan Together Before Buying Anything
Ready to give your kitchen a breathtaking, low-demolition transformation without the stress or expense of a major overhaul?
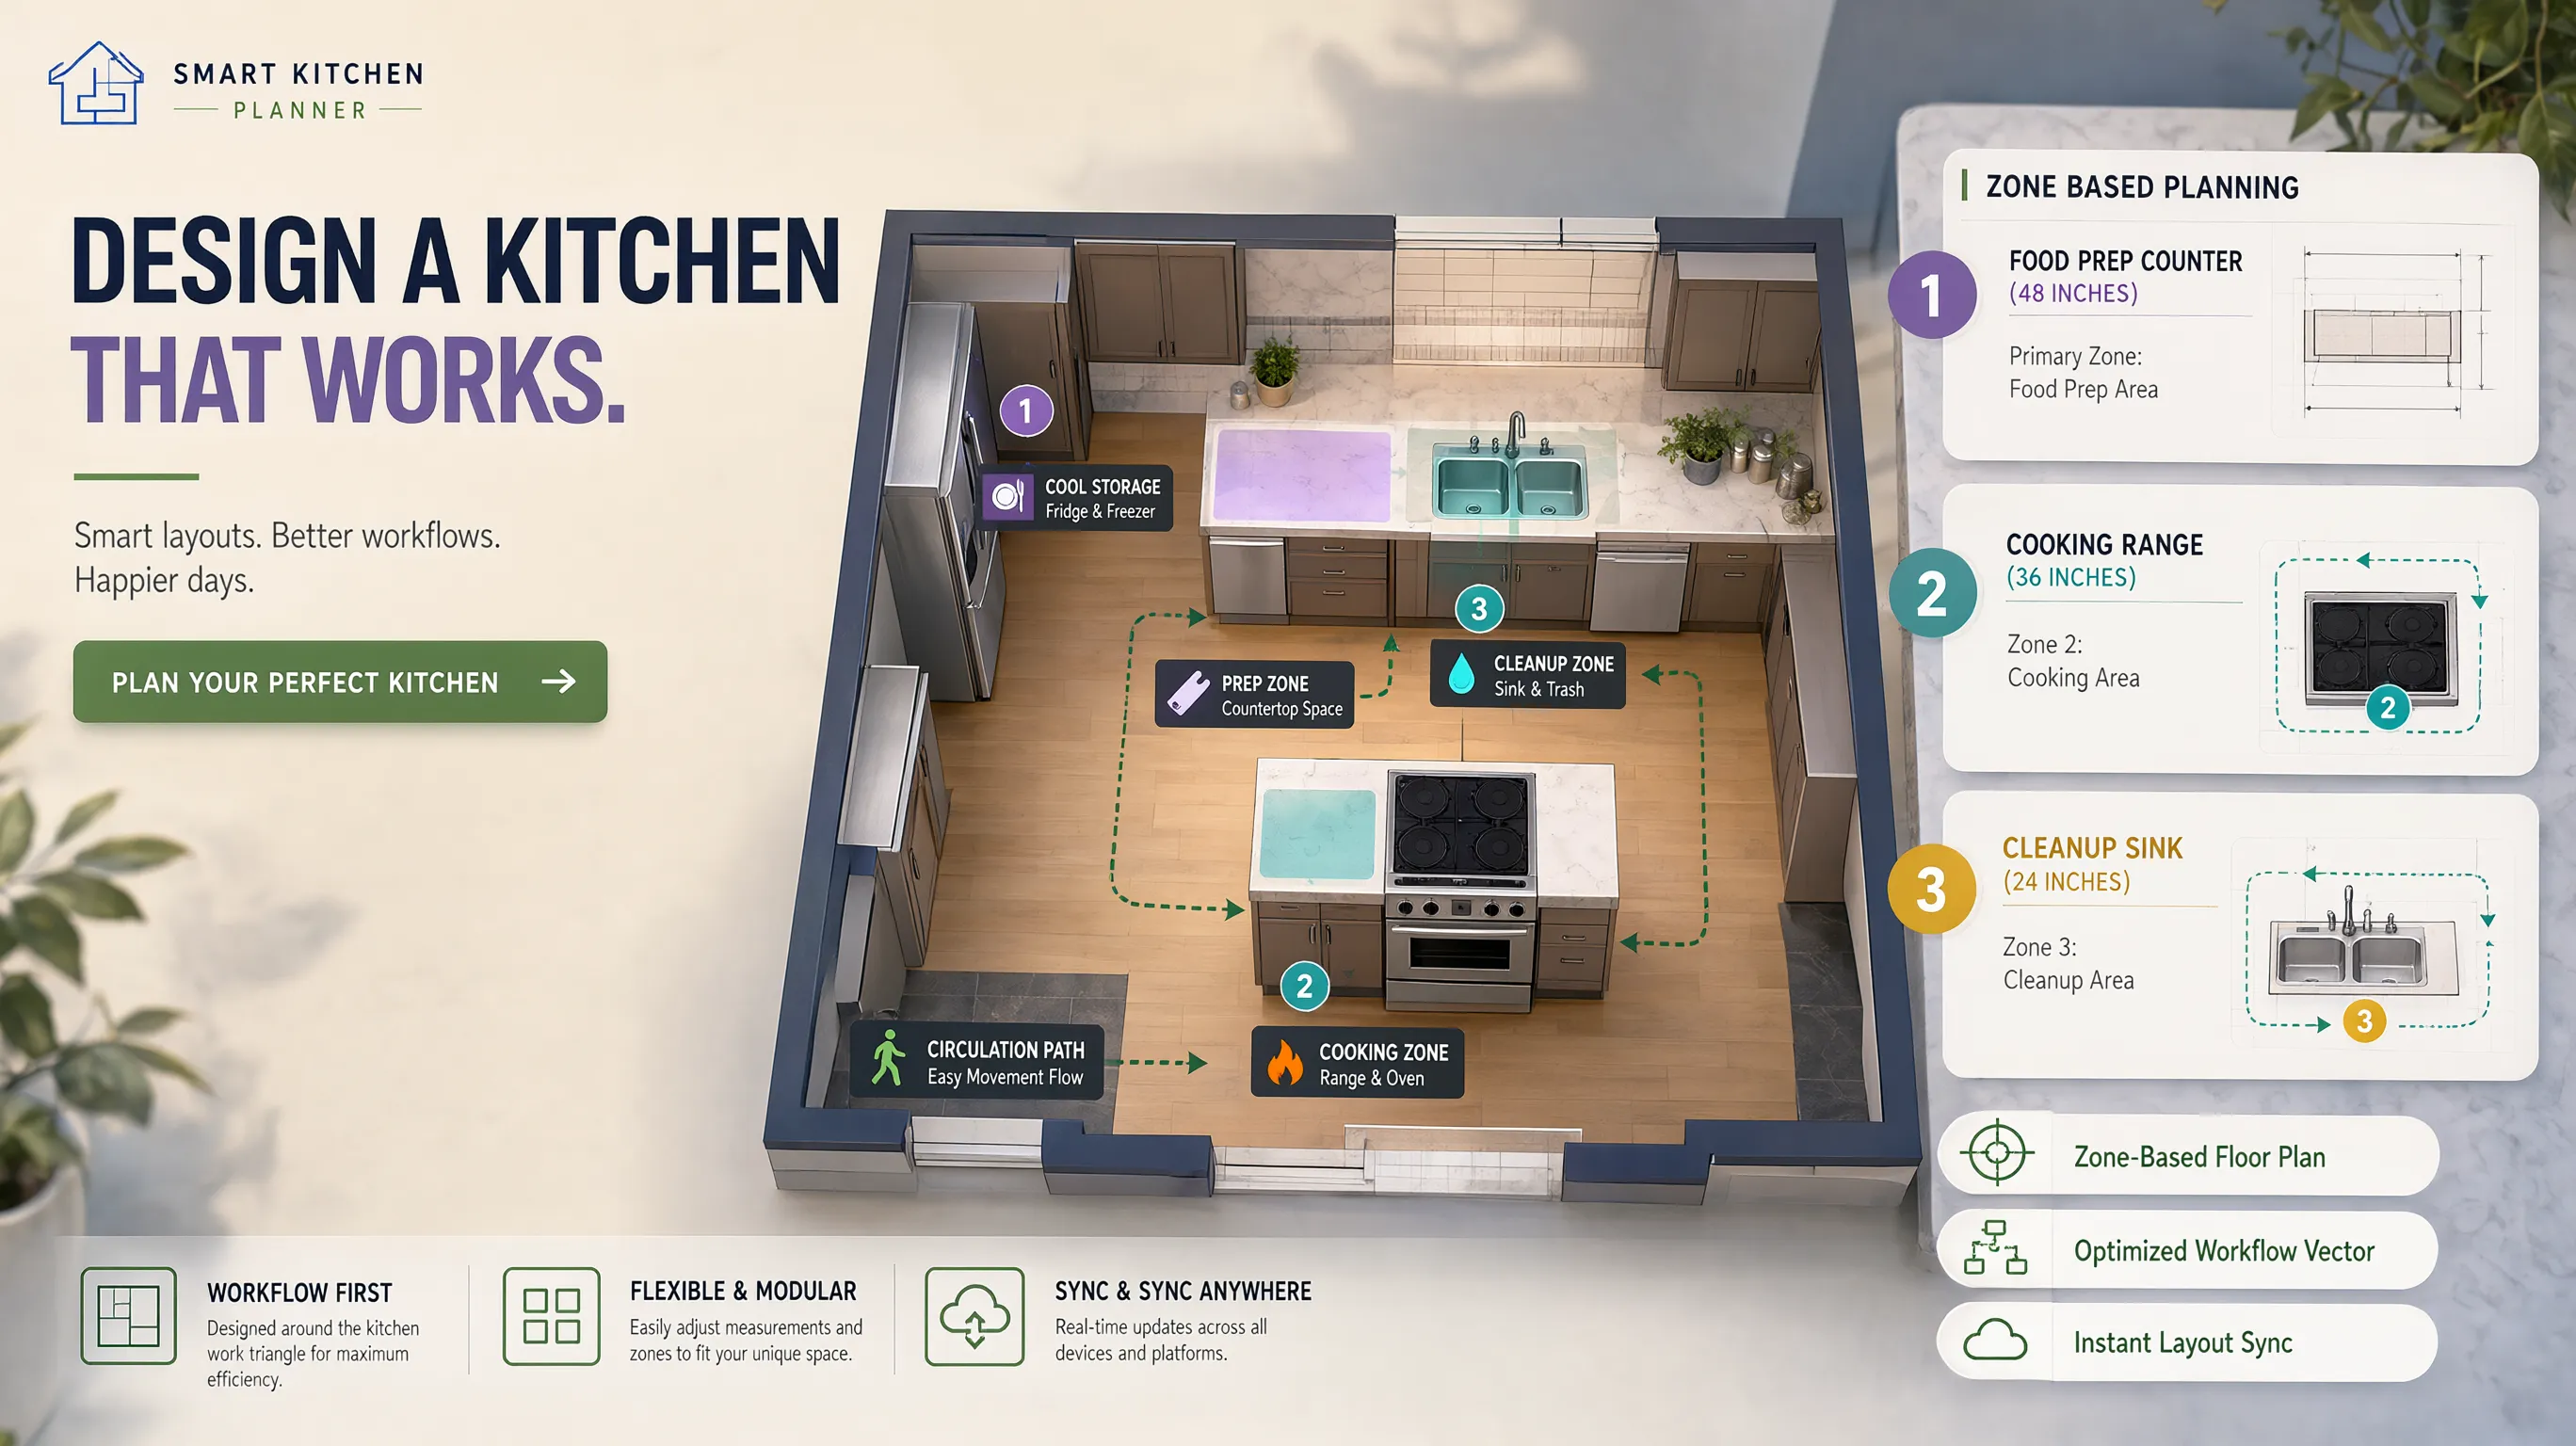
Before buying paint cans, ordering hardware, or removing cabinet doors, bring your project steps together into a clear, organized sequence. To preview everything before committing, read our digital preview workflow for testing finishes before spending a dollar.
  [ Step 1: Deep Clean Surfaces & Audit Cabinet & Counter Conditions ]
                                 |
  [ Step 2: Select Wall & Cabinet Paint Colors Matched to Fixed Finishes ]
                                 |
  [ Step 3: Order Hardware Pulls & Measure Center-to-Center Hole Spacing ]
                                 |
  [ Step 4: Install Under-Cabinet LED Lighting & Replace Faucet ]
                                 |
  [ Step 5: Paint Cabinets, Refresh Grout & Style Clear Counters ]
The Ultimate Low-Demolition Refresh Sign-Off Checklist:
- [ ] Audit Fixed Elements: Confirm your new paint colors match your existing countertops and flooring.
- [ ] Measure Hardware Holes: Verify center-to-center hole distances on existing cabinet handles before ordering replacements.
- [ ] Prep Surfaces Thoroughly: Degrease, sand, and prime cabinet doors before applying cabinet enamel.
- [ ] Install Under-Cabinet Task Lights: Hardwire or mount LED tape lights rated between 2700K and 3000K.
- [ ] Upgrade High-Use Fixtures: Replace old faucets, yellowed outlet covers, and discolored grout lines.
- [ ] Style Surfaces Intentionally: Keep primary prep counters clear and group daily essentials on sleek trays.
Transform Your Kitchen with Total Confidence
Updating a room you love should be an exciting and rewarding experience. You don't need to spend tens of thousands of dollars on full structural demolition or get lost in complicated design processes to create a bright, contemporary space.
Focusing on high-impact visual details—such as fresh cabinet finishes, warm task lighting, coordinated hardware, and clear surfaces—allows you to unlock your room's full potential quickly, affordably, and effortlessly.
Plan your sequence, pick your finishes, and bring your complete kitchen vision to life today!
External Resources & Industry Standards
To explore deeper technical insights into residential space planning, material safety, and lighting standards, consult these authoritative industry resources:
- National Kitchen & Bath Association (NKBA) – Official guidelines for kitchen planning standards, finish durability, and material performance.
- Illuminating Engineering Society (IES) – Residential lighting standards, bulb warmth ratings, and task lighting guidelines.
- Sustainable Furnishings Council (SFC) – Official guidelines for non-toxic finishes, low-VOC paints, and eco-friendly home materials.
Frequently Asked Questions About Updating a Kitchen Without Remodeling
Is it really possible to make an old kitchen look modern without tearing out cabinets?
Yes. Over 70% of a kitchen's visual footprint comes down to surface finishes, lighting, and hardware. If your cabinet boxes are structurally sound, applying a durable cabinet-grade enamel, switching to modern hardware, updating the backsplash, and adding under-cabinet LED task lighting creates a complete visual transformation at a fraction of the cost of a full demolition.
What is the cheapest update that makes the biggest visual impact in a kitchen?
Replacing outdated cabinet hardware and installing under-cabinet LED lighting deliver the highest return on investment. Upgrading small, worn handles to sleek brushed brass or matte black pulls instantly modernizes cabinet doors, while task lighting eliminates heavy shadows across your countertops, making the whole room feel larger, cleaner, and brighter overnight.
Can you paint oak or dark wood cabinets without the wood grain showing through?
Yes, but proper surface preparation is critical. To achieve a smooth, modern satin finish over heavy oak grain, the wood must be thoroughly degreased, sanded, and treated with a grain-filling primer or wood filler before applying two coats of high-adhesion urethane enamel. Skipping bonding primer will cause wood tannins and heavy grain patterns to bleed through the paint over time.
How do I choose new cabinet handles if my current holes aren't a standard size?
Measure the exact center-to-center distance between the two screw holes on your existing handles. If your current hole spacing is an awkward or discontinued size, you can install new hardware pulls fitted with decorative backplates. Backplates cover existing screw holes and surface indentations cleanly without requiring you to fill, sand, and repaint cabinet doors.
How can I update a kitchen backsplash without removing the old tiles?
Tearing out old tile often damages surrounding drywall, but you have two low-demolition alternatives. You can deep-clean the tile with a degreaser, apply an extreme-adhesion tile bonding primer, and paint the backsplash using a specialized water-resistant tile enamel. Alternatively, scrubbing stained grout lines and applying a bright white or soft gray acrylic grout colorant pen instantly refreshes tired tile grid lines.
What type of lighting works best for dark kitchen countertops?
Install hardwired or continuous LED strip tape directly under upper wall cabinets. Choose LED bulbs strictly rated between 2700K and 3000K (Kelvin) with a High Color Rendering Index (CRI 90+). Warm, high-CRI light floods prep surfaces with shadow-free task illumination, making food look vibrant while eliminating dark perimeter shadows.
How do I make honey oak cabinets look good without painting them?
If you want to keep natural oak cabinets, surrounding them with the right accent colors will make the wood grain look intentional rather than dated. Avoid bright blue wall paint, which creates a harsh contrast that makes oak appear more orange. Instead, pair honey oak with soft sage green, warm greige, or pale cream wall paint, and upgrade to antique brass or matte black hardware.
Can worn granite or quartz countertops be restored without replacing them?
Yes. Natural stone countertops lose their luster over time due to built-in film and sealant wear. Cleaning granite or quartz with a pH-neutral stone cleaner, buffing out light scuffs with a stone polishing compound, and applying a fresh coat of penetrating stone sealer restores deep luster, seals raw pores, and protects against water rings and oil stains.
What is the best paint finish for kitchen cabinets?
Use a specialized satin or semi-gloss urethane acrylic enamel designed specifically for cabinetry and trim. Standard wall paint is too soft for high-touch surfaces, whereas cabinet enamel cures to a hard, washable, impact-resistant finish that resists daily oils, moisture, and frequent wiping.
How do I keep my countertops clear if I don't have enough cabinet space?
Focus on point-of-use vertical organization. Hang chef knives on a sleek wall-mounted magnetic backsplash strip, mount paper towel holders under upper cabinets, group daily oils and seasonings on a single decorative marble tray, and move rarely used small appliances into lower cabinets or pantries to keep your main chopping surface 100% clear.
How can I update my kitchen flooring without ripping up old tile or wood?
You can install floating luxury vinyl plank (LVP) flooring directly over most existing tile or hard surfaces, provided the floor is flat and sound. Floating LVP is 100% waterproof, durable, and comes in realistic light oak wood finishes that instantly elevate a room without the mess, dust, or noise of floor demolition.
What order should I follow when updating my kitchen without remodeling?
Follow a logical 5-step sequence to avoid working backward: (1) Clean & Prep: Deep clean, degrease, and repair cabinets, walls, and countertops. (2) Paint & Finishes: Paint perimeter walls, refresh tile grout, and refinish or enamel cabinet doors. (3) Lighting & Plumbing: Install under-cabinet LED task lights and upgrade your faucet. (4) Hardware Installation: Mount new cabinet handles, knobs, and wall switch plates. (5) Styling & Decluttering: Clear primary prep counters, lay a washable runner rug, and restyle open surfaces.


