

You open your kitchen cabinet looking for a simple baking dish, move three heavy glass bowls out of the way, reach into the dark back corner, and accidentally knock over a box of plastic wrap.
You sigh, slide the bowls back in, and try opening a deep lower drawer for a skillet—only to have its handle catch on an unorganized pile of pot lids. You stand back, look around your kitchen, and feel an immediate sense of spatial defeat.
Here is the truth: you do not need to spend tens of thousands of dollars on a complete gut remodel just to get extra kitchen storage.
A overflowing kitchen rarely suffers from a lack of physical cabinet boxes. It suffers from wasted vertical space, unorganized deep shelf corners, and poor point-of-use placement. By systematically auditing your existing footprint, using vertical real estate, and matching storage solutions to real daily routines, you can improve kitchen storage and double your usable capacity without tearing out a single wall.
Here is how to map, organize, and expand your storage step by step.
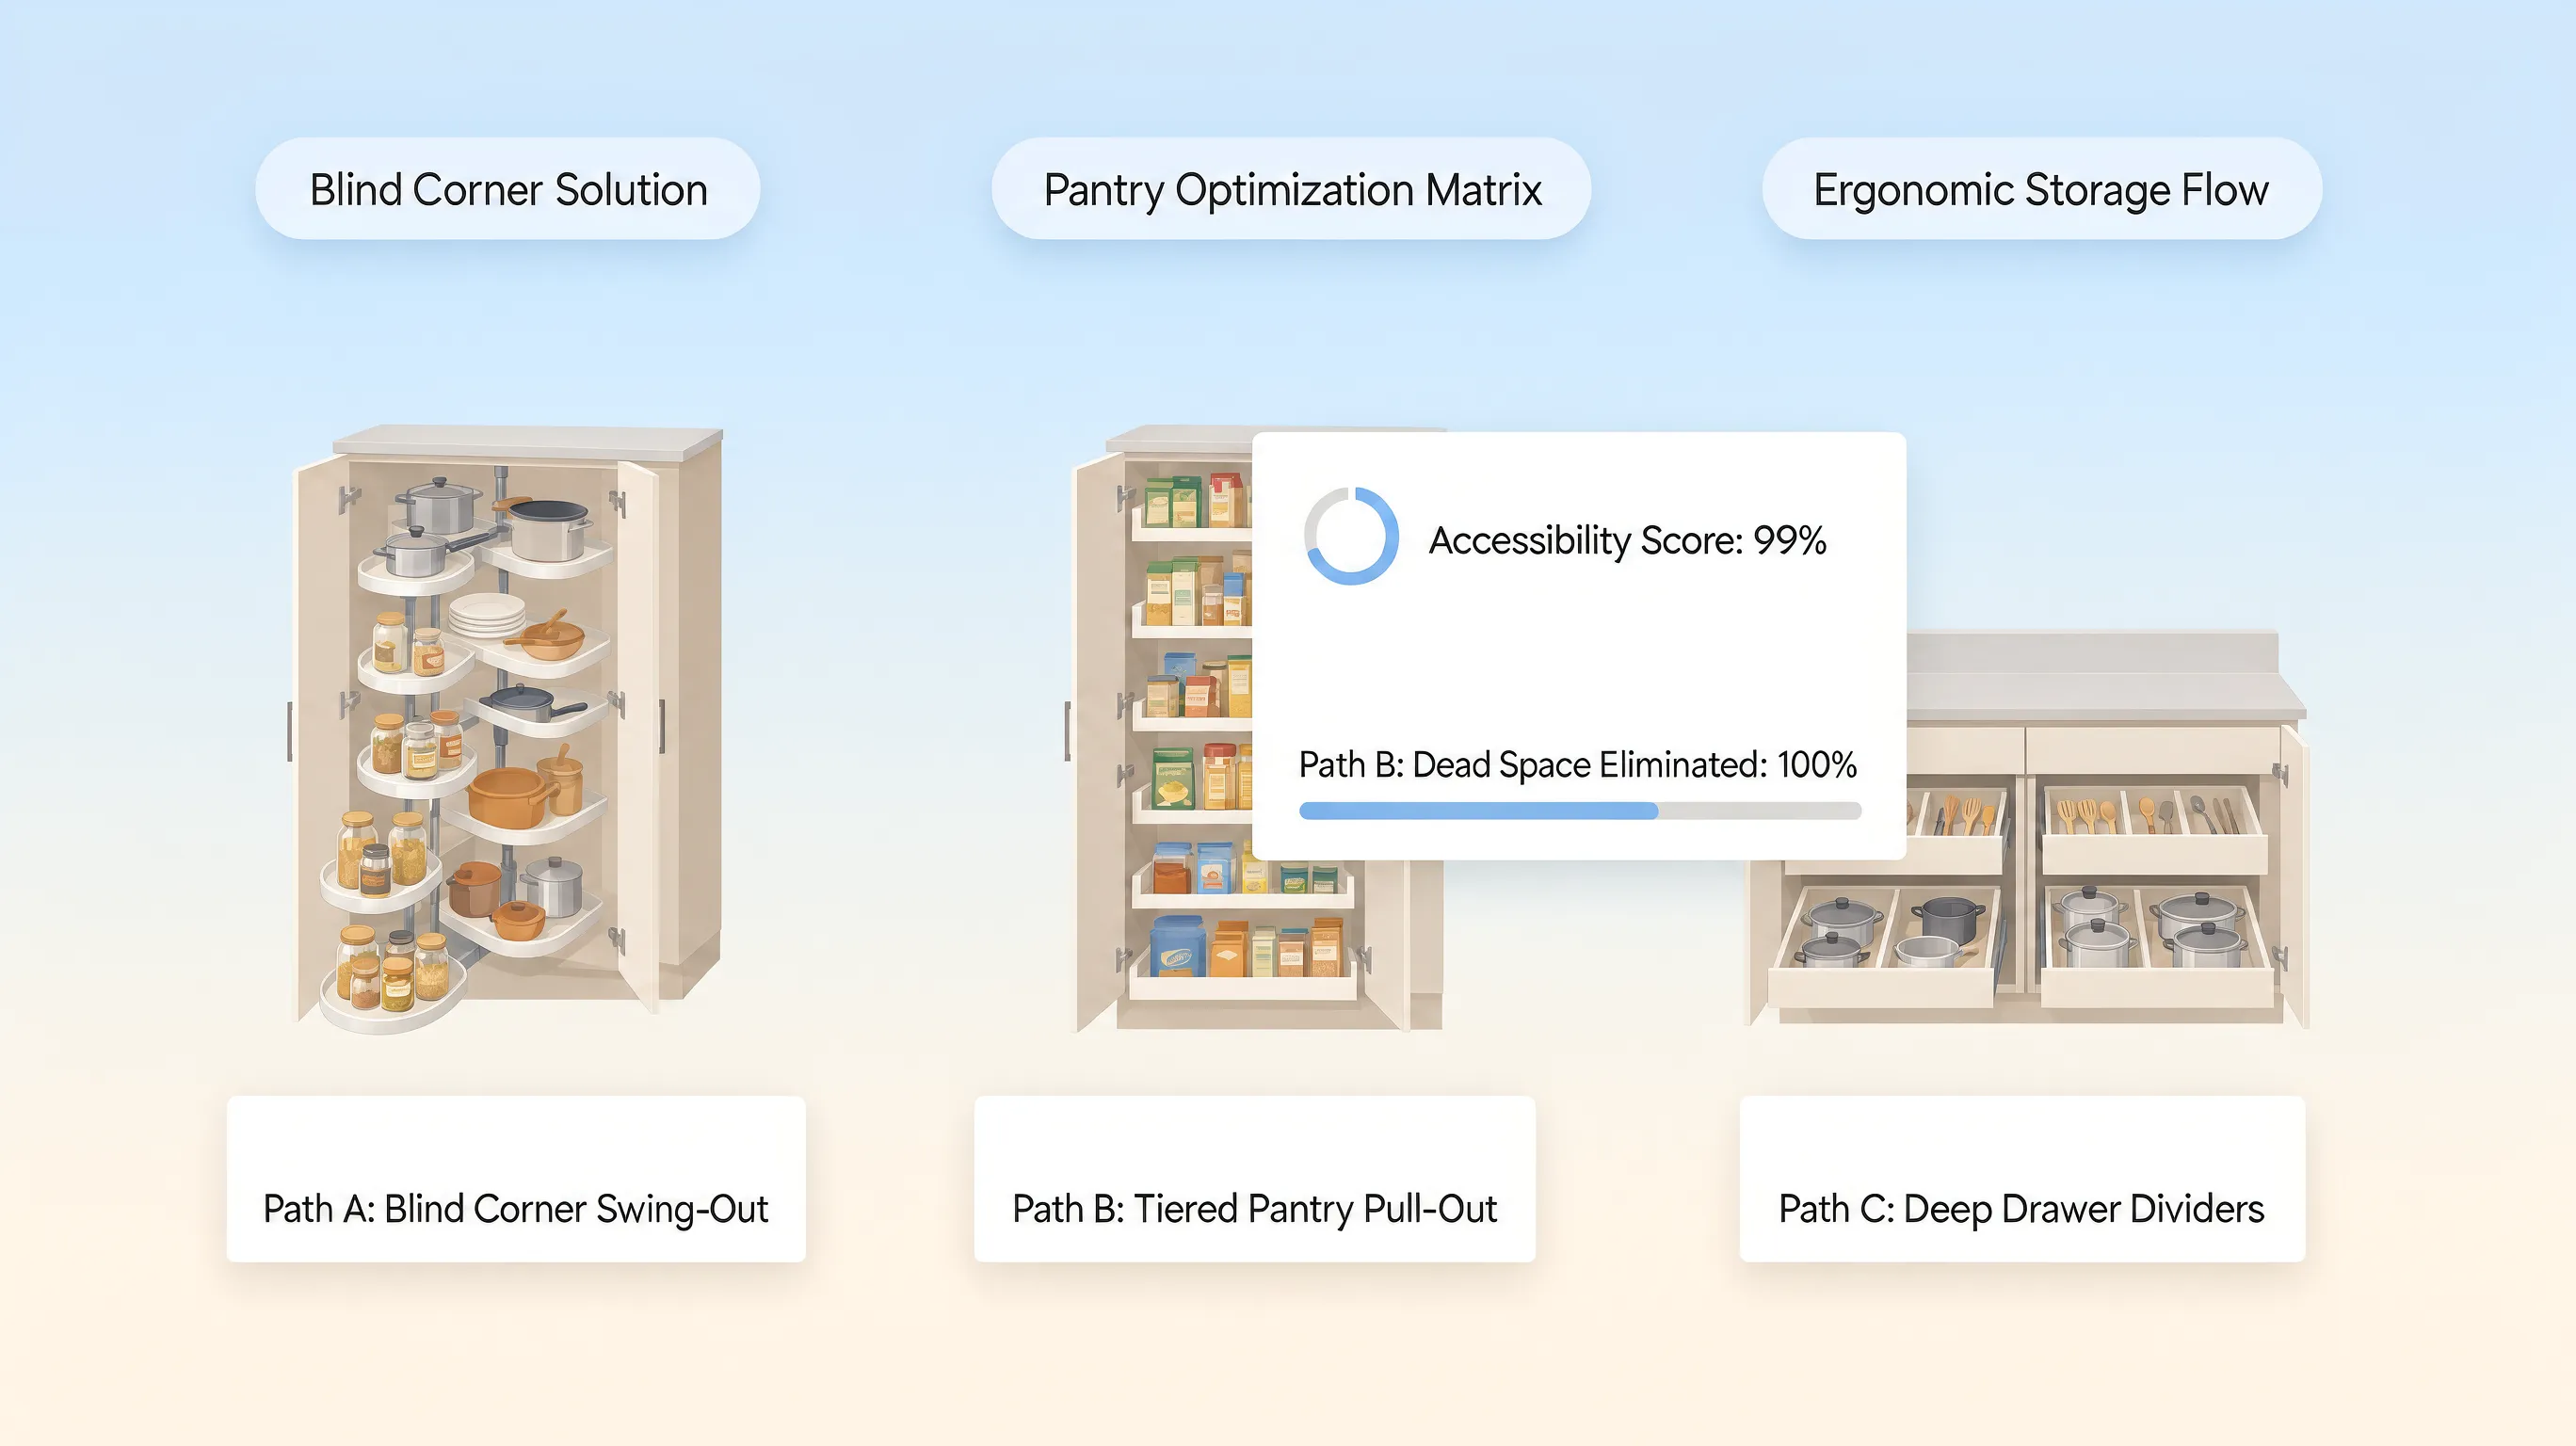
1. Improve Kitchen Storage Without Remodeling the Entire Kitchen
When homeowners feel overwhelmed by cluttered counters and jammed drawers, their immediate reaction is often looking at expensive custom cabinet catalogs.
However, tearing out your cabinetry won't solve an underlying organization problem. Adding larger cabinets without a clear system simply gives you more space to pile unorganized clutter.
- Adds cabinet volume; zero guarantee of tidiness
- Optimizes internal space using targeted inserts
Before looking at contractor estimates, evaluate your storage against three core functional goals:
- Single-Motion Retrieval: Can you pull out your primary cutting board, skillet, or favorite spice jar in a single motion without moving three unrelated items first?
- Total Visual Inventory: Can you open your dry pantry cabinet and see 100% of your ingredients at a glance without moving boxes around?
- Point-of-Use Alignment: Are your dish soaps stored directly at the sink, your pots stored at the cooktop, and your chef knives stored at your primary prep counter?
2. Find the Hidden Space Your Kitchen Is Already Wasting
The fastest way to maximize kitchen storage is identifying the invisible "dead zones" hiding inside your current layout.
Most standard kitchen cabinets waste up to 40% of their actual cubic volume because items are stored flat on shelves, leaving empty air space floating above them.
Run a quick spatial audit across your room:
- Check vertical shelf gaps: Do you have 6 to 8 inches of empty air floating above your coffee mugs or soup cans on upper shelves?
- Inspect cabinet doors: Are the interior backs of your lower cabinet doors completely bare?
- Examine lower kick-spaces: Is the area beneath your lower base cabinets sealed off with empty toe-kick panels?
3. Organize Kitchen Cabinets So You Can Reach What You Need
If getting a simple salad bowl requires kneeling down and digging past heavy roasting pans, your internal setup is working against your daily physical movement.
Executing high-efficiency kitchen cabinet organization requires grouping items by access frequency rather than random size matching.
   HIGH FREQUENCY (Waist-to-Eye Level)    ===> Everyday Plates, Bowls, Glasses & Spices
   MEDIUM FREQUENCY (Lower Base Drawers)  ===> Heavy Pots, Skillets & Mixing Bowls
   LOW FREQUENCY (Top Shelf / Above Fridge) ===> Holiday Platters, Turkey Roasters & Appliances
Rules for assigning cabinet zones:
- The Prime Accessibility Belt: Reserve the upper shelves sitting between waist and eye level strictly for items you use daily—such as coffee mugs, dinner plates, drinking glasses, and primary cooking oils.
- Store Heavy Items Low: Place heavy cast-iron cookware, stand mixers, and Dutch ovens in lower base cabinets to prevent strain when lifting.
- Group items by Activity: Store all baking items (flour, sugar, baking sheets, measuring spoons) together inside a single designated "Baking Station" cabinet.
If you are planning overall spatial flow across connected rooms, explore our guide on positioning key storage zones adjacent to major appliances.
4. Make Deep Kitchen Shelves Useful Instead of Losing Things at the Back
Deep 24-inch base cabinet shelves hold massive storage potential, but without proper inserts, they turn into dark visual black holes where spices, canned goods, and plastic containers disappear forever.
Upgrading kitchen shelf storage is all about bringing the back of the cabinet to the front.
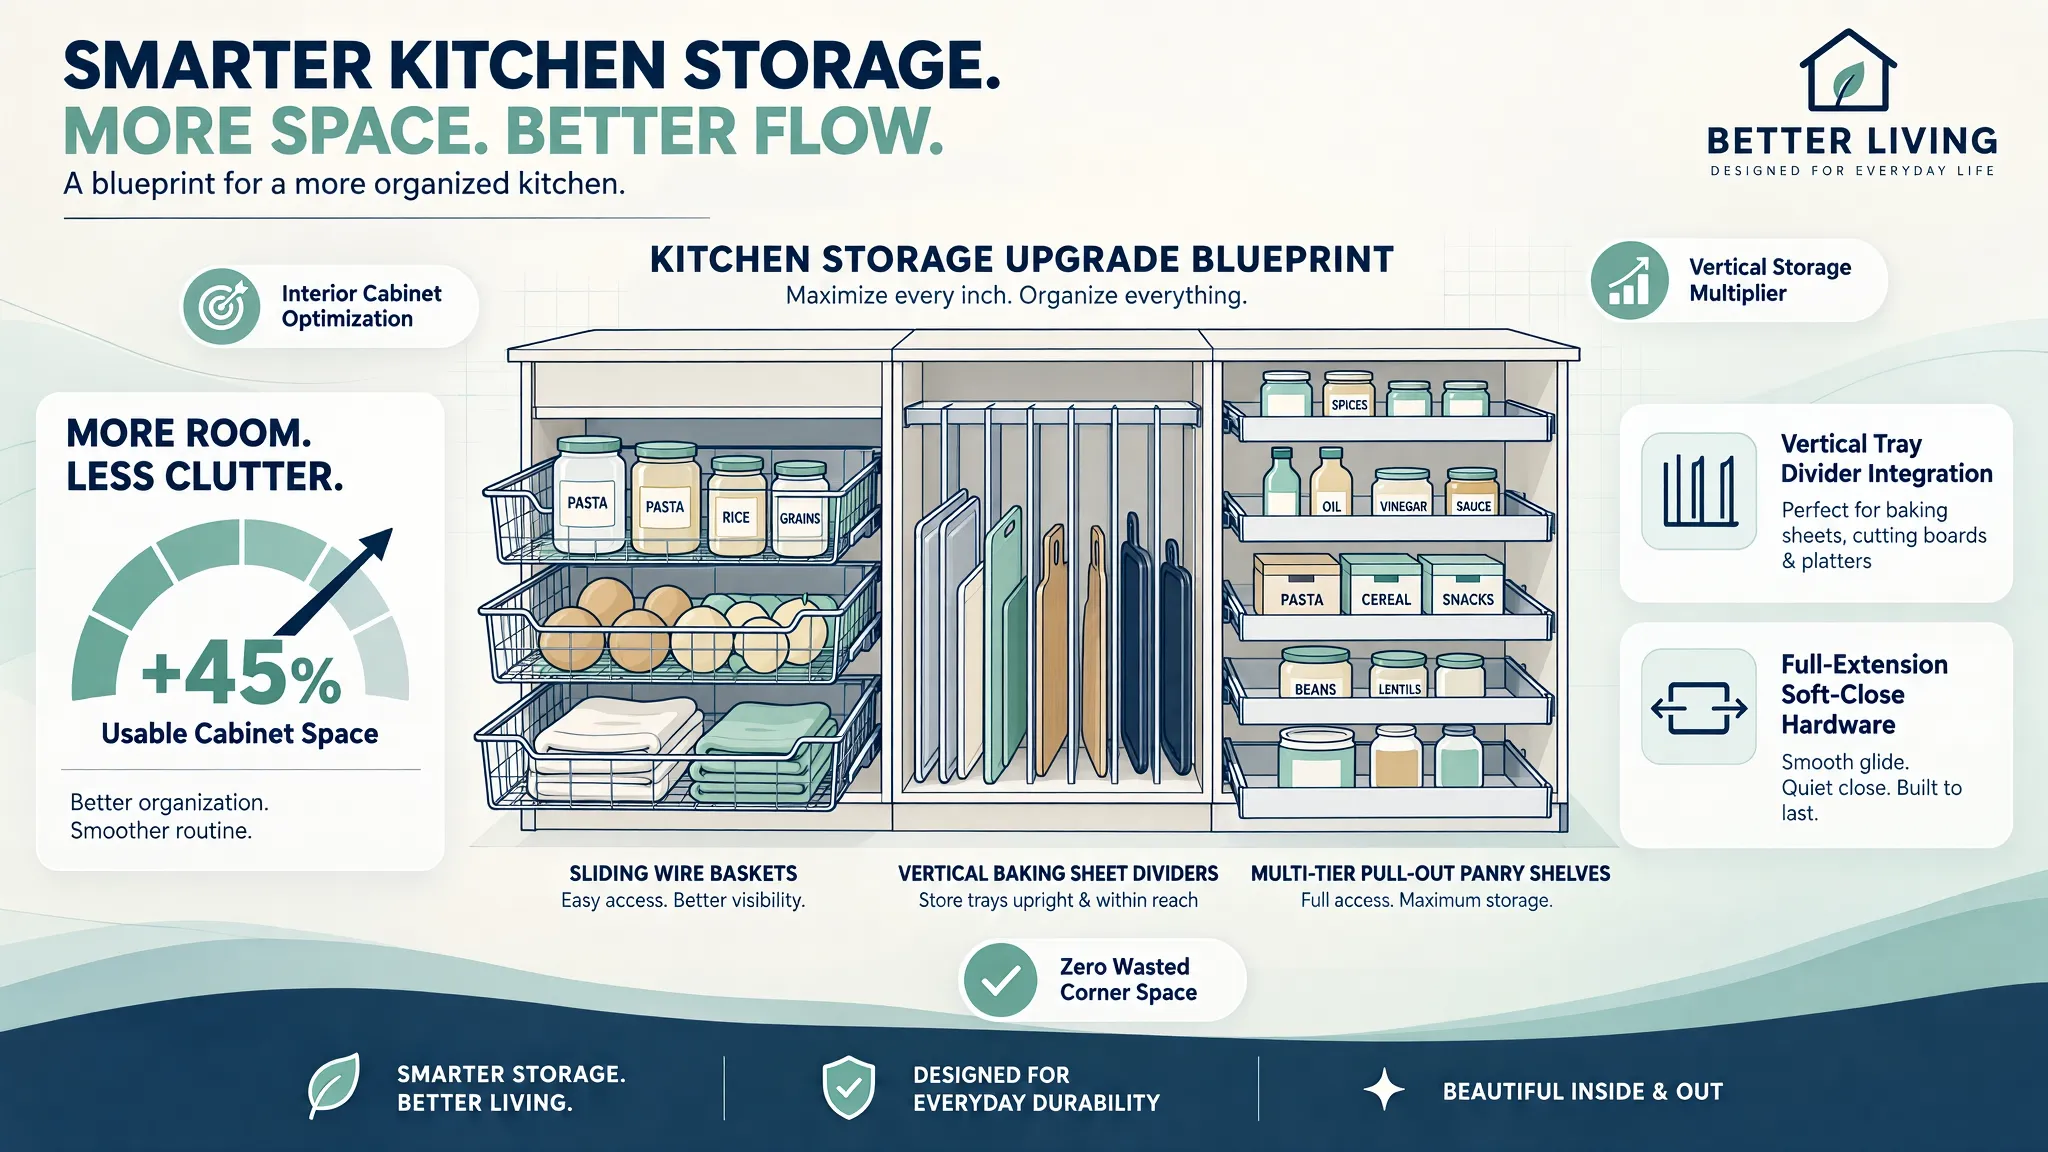
(Must crawl on hands & knees)
| Smooth Full-Extension |
| Sliding Wire Drawer |
+--------------------------+
(100% contents visible instantly)
Strategies to conquer shelf depth:
- Retrofit Full-Extension Roll-Out Drawers: Replace fixed wooden lower shelves with aftermarket full-extension wood or wire slide-out drawers. This lets you pull the entire shelf out into plain daylight.
- Use 3-Tier Step Risers: Place 3-tier acrylic step risers on upper pantry shelves so labels on rear canned goods sit higher than front cans, keeping every item visible.
- Incorporate Rotating Turntables: Place 10 to 12-inch Lazy Susan turntables on deep corner shelves to bring back items forward with a gentle spin.
5. Turn Kitchen Drawers Into Organized Storage, Not Junk Collectors
Deep drawers offer far superior storage efficiency compared to standard cabinets, but without internal dividers, they devolve into chaotic junk drawers filled with tangled utensils and loose wraps.
Achieving sleek kitchen drawer organization relies on custom internal compartmentalization.
Drawer organization tactics:
- Use Expandable Bamboo Dividers: Fit shallow utensil drawers with expandable bamboo divider trays to keep spatulas, whisks, and measuring spoons separated by category.
- Store Spices in Drawers: Move spices from high upper cabinets down into a shallow drawer right beside your stove, laid flat on an angled tier tray.
- Store Plates in Deep Base Drawers: Swap upper cabinet plate storage for deep lower drawers fitted with adjustable wooden pegs to hold stacked dishes safely at waist height.
For professional guidelines on hardware load-bearing capacities, cabinet safety, and runner durability, consult the Furniture Industry Research Association (FIRA).
6. Use Vertical Kitchen Storage When Counter Space Runs Out
When your countertops are crowded and your drawers are maxed out, stop looking horizontally across your worktops. Look up toward your vertical walls!
Capitalizing on vertical kitchen storage shifts daily tools off busy preparation counters and onto open wall surfaces.
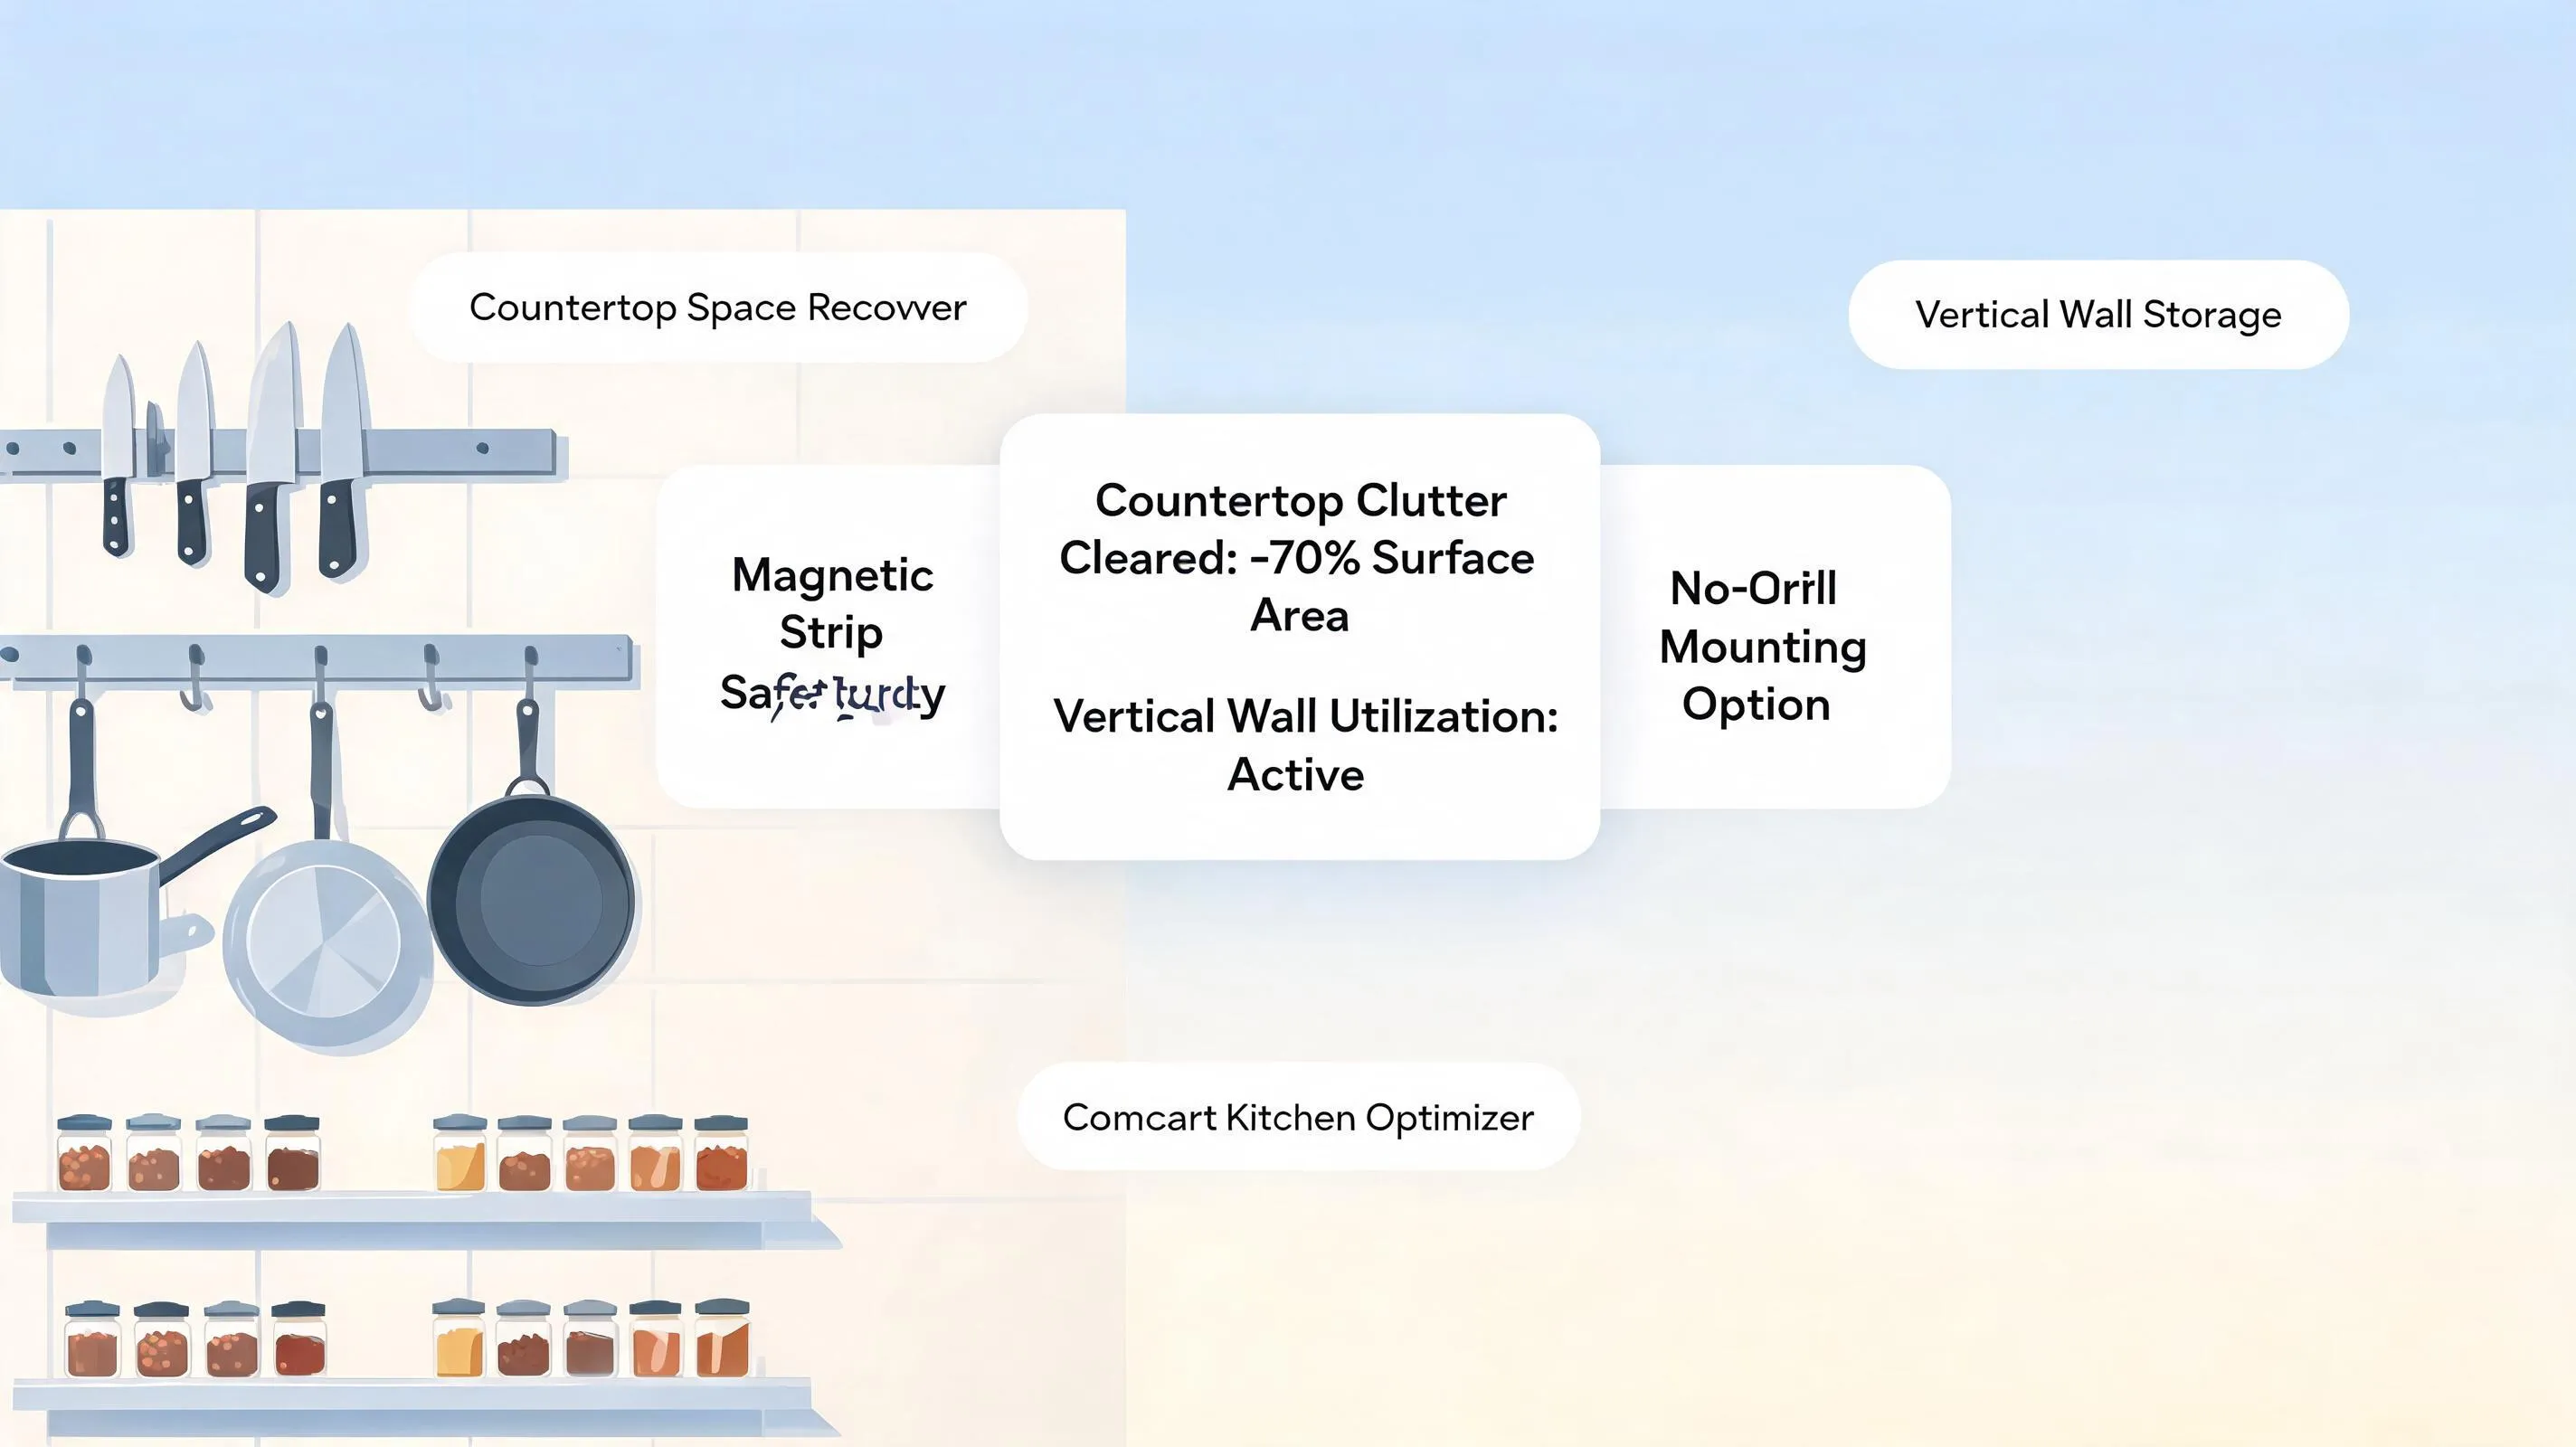
[ Unused Backsplash / Wall Space ]
                 |
                 +---> Mount Stainless Steel Magnetic Knife Strip (Lifts knives off counter)
                 +---> Hang Metal Utility Rail with S-Hooks (Holds spatulas & measuring cups)
                 +---> Install Wall-Mounted Spice Ledges (Keeps seasonings accessible)
Smart vertical storage tactics:
- Mount Magnetic Tool Strips: Install a heavy-duty magnetic strip along your backsplash to hold chef knives, kitchen shears, and metal spatulas clear of counter space.
- Hang Backsplash Utility Rails: Attach a slender stainless steel hanging rail beneath upper cabinets to suspend ladles, strainers, and pot holders on movable S-hooks.
- Install Open Wall Shelving: Mount solid wood floating shelves along open wall nooks to store everyday dinnerware, cookbooks, and coffee canisters vertically.
7. Make the Space Under the Kitchen Sink Work Harder
The cabinet beneath the kitchen sink is notoriously chaotic due to central drain pipes, garbage disposals, and water lines interrupting open space.
Executing smart under-sink kitchen storage turns an awkward cabinet into a safe, organized cleaning station.
  [ Under-Sink Plumbing Obstacles ]
                 |
                 +---> Expandable Under-Sink Storage Rack (Adjusts around drain pipes)
                 +---> Pull-Out Wire Sliding Drawer Base (Glides out past door frames)
                 +---> Interior Door-Mounted Basket Caddy (Holds sponges & scrubbers)
Under-sink organization steps:
- Use an Expandable Under-Sink Shelf: Install a modular metal shelf unit featuring removable snap-in floor plates that adjust around vertical plumbing pipes and disposals.
- Mount Sliding Wire Drawers: Secure full-extension sliding wire baskets to the cabinet base so cleaning sprays and dish soaps glide out into clear view.
- Attach an Interior Door Caddy: Hang a wire caddy over the inside of the cabinet door to store dish sponges, rubber gloves, and scrub brushes out of sight.
For official building safety standards, plumbing clearances, and chemical storage safety codes, consult the International Code Council (ICC).
8. Tame Kitchen Corner Cabinets Without Losing Items in the Back
Deep L-shaped corner cabinets (often called "blind corners") are notorious storage traps where large pots and appliances go to get lost.
Solving corner kitchen cabinet storage requires installing mechanical hardware designed to bring corner contents out into the room.
Corner storage solutions:
- Install LeMans Swivel Shelves: Retrofit blind corner cabinets with a LeMans pull-out shelf system. The kidney-shaped shelves extend smoothly past the cabinet frame, bringing heavy pots out into plain daylight.
- Add a Heavy-Duty Lazy Susan: Insert a 2-tier wooden Lazy Susan turntable inside L-shaped corner base cabinets to store mixing bowls, blenders, and food processors.
9. Store Pots, Pans, Lids, and Food Containers Without the Daily Tangle
Bulky cookware and plastic food storage containers are two of the hardest categories to keep organized because their varied shapes lead to messy stacks.
Executing clean pots and pans storage comes down to organizing items vertically rather than nesting them inside each other.
[ Medium Skillet ]
[ Small Skillet ]
(Must lift top 2 pans to get bottom)
| Pan 1 | Pan 2 | Pan 3 | Pan 4 |
+-------------------------------+
(Pull out any single pan instantly)
Tackle cookware and containers:
- File Skillets Vertically: Place an adjustable wire pan rack inside lower drawers or cabinets to file skillets and frying pans upright on their edges like books.
- Organize Lids Independently: Attach a low-profile tension rod across the front of a deep drawer or mount a wire lid rack to the inside of a cabinet door to hold pot lids upright.
- Match Food Containers Immediately: Store plastic food containers with their matching lids snapped on, or keep lids contained inside a dedicated wire mesh basket directly beside the containers.
10. Create a Pantry System That Makes Food Easy to Find
Have you ever purchased duplicate cans of black beans or boxes of pasta, only to discover three unopened packages buried at the back of your pantry?
Building a functional pantry organization system cuts food waste and speeds up weeknight meal prep by keeping every ingredient visible.
Pantry organization rules:
- Decant Dry Goods into Clear Canisters: Transfer flour, sugar, rice, and oats into clear airtight containers. Square or rectangular canisters stack neatly without wasting corner space.
- Group Supplies by Category: Assign dedicated clear acrylic bins for specific food groups (e.g., Bin 1 = Baking Supplies, Bin 2 = Breakfast Grains, Bin 3 = Snacks).
- Label Container Fronts: Use simple printed labels on pantry bins so household members know exactly where ingredients belong.
11. Clear Kitchen Counters Without Hiding Everything You Use Every Day
Leaving coffee makers, knife blocks, toaster ovens, and spice racks on your countertops consumes your usable chopping space, making your whole kitchen feel cramped.
Achieving effective kitchen counter organization requires clearing flat surfaces while keeping daily tools accessible.
Counter-clearing strategies:
- Protect the Primary Prep Zone: Pick the longest continuous counter run between your sink and stove. Keep this specific surface 100% clear of appliances, food items, and loose mail.
- Create an Appliance Garage: Group daily small appliances (like toasters and blenders) inside a dedicated cabinet nook or lower appliance garage to keep them hidden when not in use.
- Use a Tray for Cooking Oils: Place daily cooking essentials—like olive oil, sea salt, and pepper grinders—onto a single sleek marble or wooden tray beside the stove to turn clutter into a curated accent.
If you are evaluating complete storage updates for compact spaces, review our guide on clearing counters and maximizing internal cabinet space.
12. Build a Kitchen Storage Plan Around What You Actually Own
Ready to transform your kitchen into a high-capacity, effortlessly organized culinary space?
Before buying acrylic bins, wire racks, or cabinet inserts, build a personalized kitchen storage planning blueprint based on real measurements and your actual belongings.
  [ Step 1: Complete Full Inventory & Purge Duplicate Items ]
                                |
  [ Step 2: Measure Internal Cabinet Heights, Widths & Depths ]
                                |
  [ Step 3: Assign Prime Reach Zones for Daily High-Use Items ]
                                |
  [ Step 4: Install Targeted Roll-Out Drawers & Vertical Hardware ]
                                |
  [ Step 5: Execute Storage Plan with Complete Spatial Confidence ]
The Ultimate Kitchen Storage Blueprint Checklist:
- [ ] Purge Duplicates: Donate worn non-stick pans, single-use gadgets, and plastic containers missing lids before buying organizers.
- [ ] Measure Internal Cabinet Footprints: Record interior height, width, and clear depth on all cabinets and drawers (subtracting 1 inch for door hinges).
- [ ] Retrofit Lower Base Cabinets: Install full-extension roll-out wooden drawers inside deep lower cabinets for full visibility.
- [ ] File Cookware Vertically: Use adjustable wire racks to file pans, skillets, and baking sheets upright rather than stacking them.
- [ ] Capitalize on Vertical Wall Space: Mount magnetic knife strips, utility hanging rails, and floating wall shelves to clear work surfaces.
- [ ] Tame Under-Sink Storage: Install expandable under-sink shelves and sliding wire baskets around drain pipes.
Step Into Your Ideal Storage-Optimized Kitchen Today
Why spend weeks worrying about crowded counters, jammed drawers, or wondering if your kitchen equipment will actually fit into your cabinets?
Designing a high-capacity, perfectly organized kitchen should be an exciting and rewarding experience. You don't need to spend thousands of dollars on custom cabinetry or struggle with complex design software to build a functional workspace.
With DesignHome, you can simply upload a picture or floor plan of your room to test layout ideas, experiment with custom storage configurations, check cabinet clearances, and unlock tailored spatial possibilities for your exact floor plan.
Eliminate storage guesswork—visualize, refine, and bring your complete kitchen storage vision to life with total confidence using DesignHome today!
External Resources & Industry Standards
To explore deeper technical insights into residential kitchen design, trade safety, and building codes, consult these authoritative industry resources:
- National Kitchen & Bath Association (NKBA) – Official guidelines for kitchen planning standards, ergonomic storage rules, and spatial clearances.
- Furniture Industry Research Association (FIRA) – Comprehensive standards for cabinet durability, drawer load testing, and hardware safety.
- International Code Council (ICC) – Residential building codes, electrical permit guidelines, and plumbing installation safety standards.
- Illuminating Engineering Society (IES) – Residential lighting standards, bulb warmth ratings, and task lighting guidelines.
Frequently Asked Questions About Improving Kitchen Storage
How can I get more storage in my kitchen without adding more cabinets?
Focus on utilizing vertical space and cabinet interiors: install stackable wire shelf risers inside upper cabinets, add full-extension roll-out drawers inside deep lower base cabinets, mount a magnetic knife strip along your backsplash, and use hanging utility rails to lift utensils off worktops.
What is the best way to organize deep lower kitchen cabinets?
Retrofit deep base cabinets with full-extension roll-out drawers or wire sliding baskets. Slide-out hardware glides the entire contents of the cabinet out into clear view, eliminating the need to crawl on your hands and knees to reach items at the back.
How do I stop pots and pans from cluttering my cabinets?
File skillets, frying pans, and baking sheets vertically using adjustable wire pan racks rather than stacking them horizontally. Store pot lids separately in a wire lid rack mounted to a cabinet door or using an in-drawer tension rod.
What should be stored in upper kitchen cabinets versus lower base cabinets?
Store lightweight, daily items in upper cabinets—such as dinner plates, cereal bowls, drinking glasses, coffee mugs, and primary food staples. Store heavy items in lower cabinets or deep drawers—such as cast-iron skillets, Dutch ovens, mixing bowls, and small kitchen appliances.
How can I make my small pantry hold more food?
Decant dry grains and baking staples into clear, stackable square canisters, place 3-tier acrylic step risers on shelves to keep back canned goods visible, and use rotating Lazy Susan turntables on corner shelves for condiment bottles and oils.
Where should I put small kitchen appliances if I don't have an appliance garage?
Store frequently used small appliances (like toasters or blenders) on a lower cabinet pull-out shelf or on a dedicated sideboard away from your main food prep counter. Move rarely used specialty appliances (like waffle makers or turkey roasters) to top upper shelves or secondary storage closets.


