

You are standing in your living room, looking at stacks of cardboard boxes, rolls of plastic sheeting, and a crew of contractors scheduled to arrive at 7:00 AM tomorrow morning.
Your heart is beating fast. Did we empty all the kitchen cabinets? Where are the dog's food bowls? Did anyone remember to cover the hardwood floor in the hallway?
Here is the cold, hard truth about home remodeling: a renovation is won or lost before a single sledgehammer hits your drywall.
When your pre-renovation prep is rushed or disorganized, your daily life quickly descends into a chaotic nightmare of ruined furniture, lost paperwork, endless dust, and expensive contractor delays. But when you follow a systematic prep plan, you protect your belongings, keep your sanity intact, and ensure your project runs smoothly on schedule and within budget. Here is how to prepare your house for renovation like a seasoned professional.
1. Start With These Decisions Before Renovation Day
The worst time to figure out who is responsible for clearing out room spaces or moving heavy appliances is when a crew of tradespeople is standing in your driveway waiting to begin.
Before demolition day arrives, sit down with your family and contractor to establish strict project boundaries and assign exact tasks.
[ Essential Scope ] =====> Structural framing, electrical rough-ins, primary plumbing
                           (Fixed contractor deadlines)

[ Optional Upgrades ] ===> Decorative wall trims, custom shelving, specialty lighting
                           (Secondary flexibility)
Lock in these core preparation decisions early:
- Define Clear Task Responsibilities: Clarify exactly which tasks you are handling (such as clearing out furniture, removing fragile art, or disconnecting electronics) versus what your contractor's crew is responsible for (such as laying floor protection or building dust barriers).
- Establish Daily Work Windows: Confirm contractor arrival times, daily quitting hours, weekend work permissions, and designated parking spots for crew trucks and trash dumpsters.
- Confirm Material Delivery Dates: Ensure primary finish fixtures—such as custom cabinetry, tile, plumbing valves, and vanity units—are physically delivered and verified on-site before demolition starts.
If you are planning major structural layouts across connected spaces, read our practical guide on combined living and dining room layout ideas to establish clear spatial boundaries before construction begins.
2. Walk Through the House and Record Its Current Condition
When construction starts, heavy power tools, ladders, and material sheets move through tight hallways and doorways. If a fresh scratch appears on your hardwood floor or a crack opens in an adjacent hallway wall, you need photographic evidence to prove whether it was pre-existing or caused by the crew.
Conducting a thorough pre-renovation property audit protects both you and your contractor against costly disputes.
Follow this condition-recording strategy:
- Take Date-Stamped Photos and Video: Walk through every room in your home—including spaces outside the active work zone—and record high-resolution, date-stamped video and photos of all walls, floors, doors, and ceilings.
- Conduct a Joint Walk-Through: Walk the site alongside your general contractor or project manager. Point out existing damage, fragile architectural details, and surfaces that require extra protection.
- Store Files Safely in the Cloud: Save all pre-renovation photos and inspection notes in a shared cloud folder so both you and your contractor have instant digital access.
3. Clear Out Furniture, Decorations, and Personal Belongings
Trying to work around a sofa pushed into the center of a room or painting around hanging wall art slows down tradespeople and practically guarantees that your belongings will get covered in fine drywall dust.
The golden rule of pre-renovation prep is simple: if a room is being renovated, it must be completely emptied.
   [ Active Work Zone ] -------------------> [ Categorized Sorting Plan ]
   Fragile & Essential Items                 Moved to Secure Private Lockboxes / Off-Site
   Large Furniture & Rugs                    Moved to On-Site Pod Storage / Unaffected Rooms
   Unused Household Clutter                  Sold, Donated, or Discarded Before Demo Day
Set up a 3-tier sorting method:
- Tier 1: On-Site Storage Units: Rent a secure portable storage container (like a PODS unit) placed in your driveway to store large sofas, dining tables, mattresses, and area rugs clean and dry on-site.
- Tier 2: Off-Site Climate-Controlled Lockers: Store antique wood furniture, delicate artwork, musical instruments, and sensitive electronics in a climate-controlled off-site storage unit to prevent warping from humidity shifts.
- Tier 3: Purge and Donate: Use your renovation prep as a natural opportunity to declutter. Sell, donate, or throw away old items you no longer need before packing them into boxes.
4. Protect the Furniture, Floors, and Items You’re Keeping
If certain heavy furniture pieces or built-in cabinets cannot be removed from the work area, they must be wrapped and sealed like delicate cargo.
Standard thin painter's drop cloths are not enough to protect surfaces from falling hammers, heavy work boots, or abrasive masonry dust.
High-impact surface protection techniques:
- Install Ram Board Heavy Floor Protection: Lay heavy-duty Ram Board cardboard sheets across all hardwood, tile, and vinyl floors along contractor walking routes. Tape all seams together tightly using heavy-duty builder's tape.
- Snap On Door Jamb Protectors: Install plastic or dense foam door jamb guards on all interior door frames along material delivery routes to prevent lumber, ladders, and tools from gouging finished wood trim.
- Double-Seal Fixed Furniture: Wrap heavy wooden tables or fixed cabinets in thick quilted furniture pads, then completely cover them in 6-mil plastic sheeting sealed tight with painter's tape to keep fine dust out.
5. Prepare Each Room for the Work Ahead
Every room type carries unique preparation requirements before demolition or construction crews step through the door.
Understanding how prep varies from room to room ensures no crucial steps are missed.
   KITCHEN PREP    ===> Empty all cabinets, disconnect gas/water, clear counters
   BATHROOM PREP   ===> Clear vanity drawers, remove medicine cabinet items, cap lines
   BEDROOM PREP    ===> Remove all bed linens, empty closets, strip wall decor
   HALLWAY PREP    ===> Remove hanging mirrors, clear floor runners, tape threshold
Specific room preparation guidelines:
- Kitchen Prep: Empty every upper and lower cabinet completely. Pack glassware and dishes in bubble wrap inside sturdy boxes. Disconnect refrigerators, dishwashers, and gas ranges safely before demo day.
- Bathroom Prep: Clear out all vanity drawers, medicine cabinets, and shower caddies. Remove hanging bath towels, rugs, and wall mirrors.
- Living Room & Bedroom Prep: Strip all bed linens, curtains, and wall art. Pack books, remotes, and decorative items in labeled containers and move all furniture away from perimeter walls.
If you are planning room updates across an older home, explore our step-by-step guide on how to update a house without changing the layout to preserve structural integrity while preparing surface upgrades.




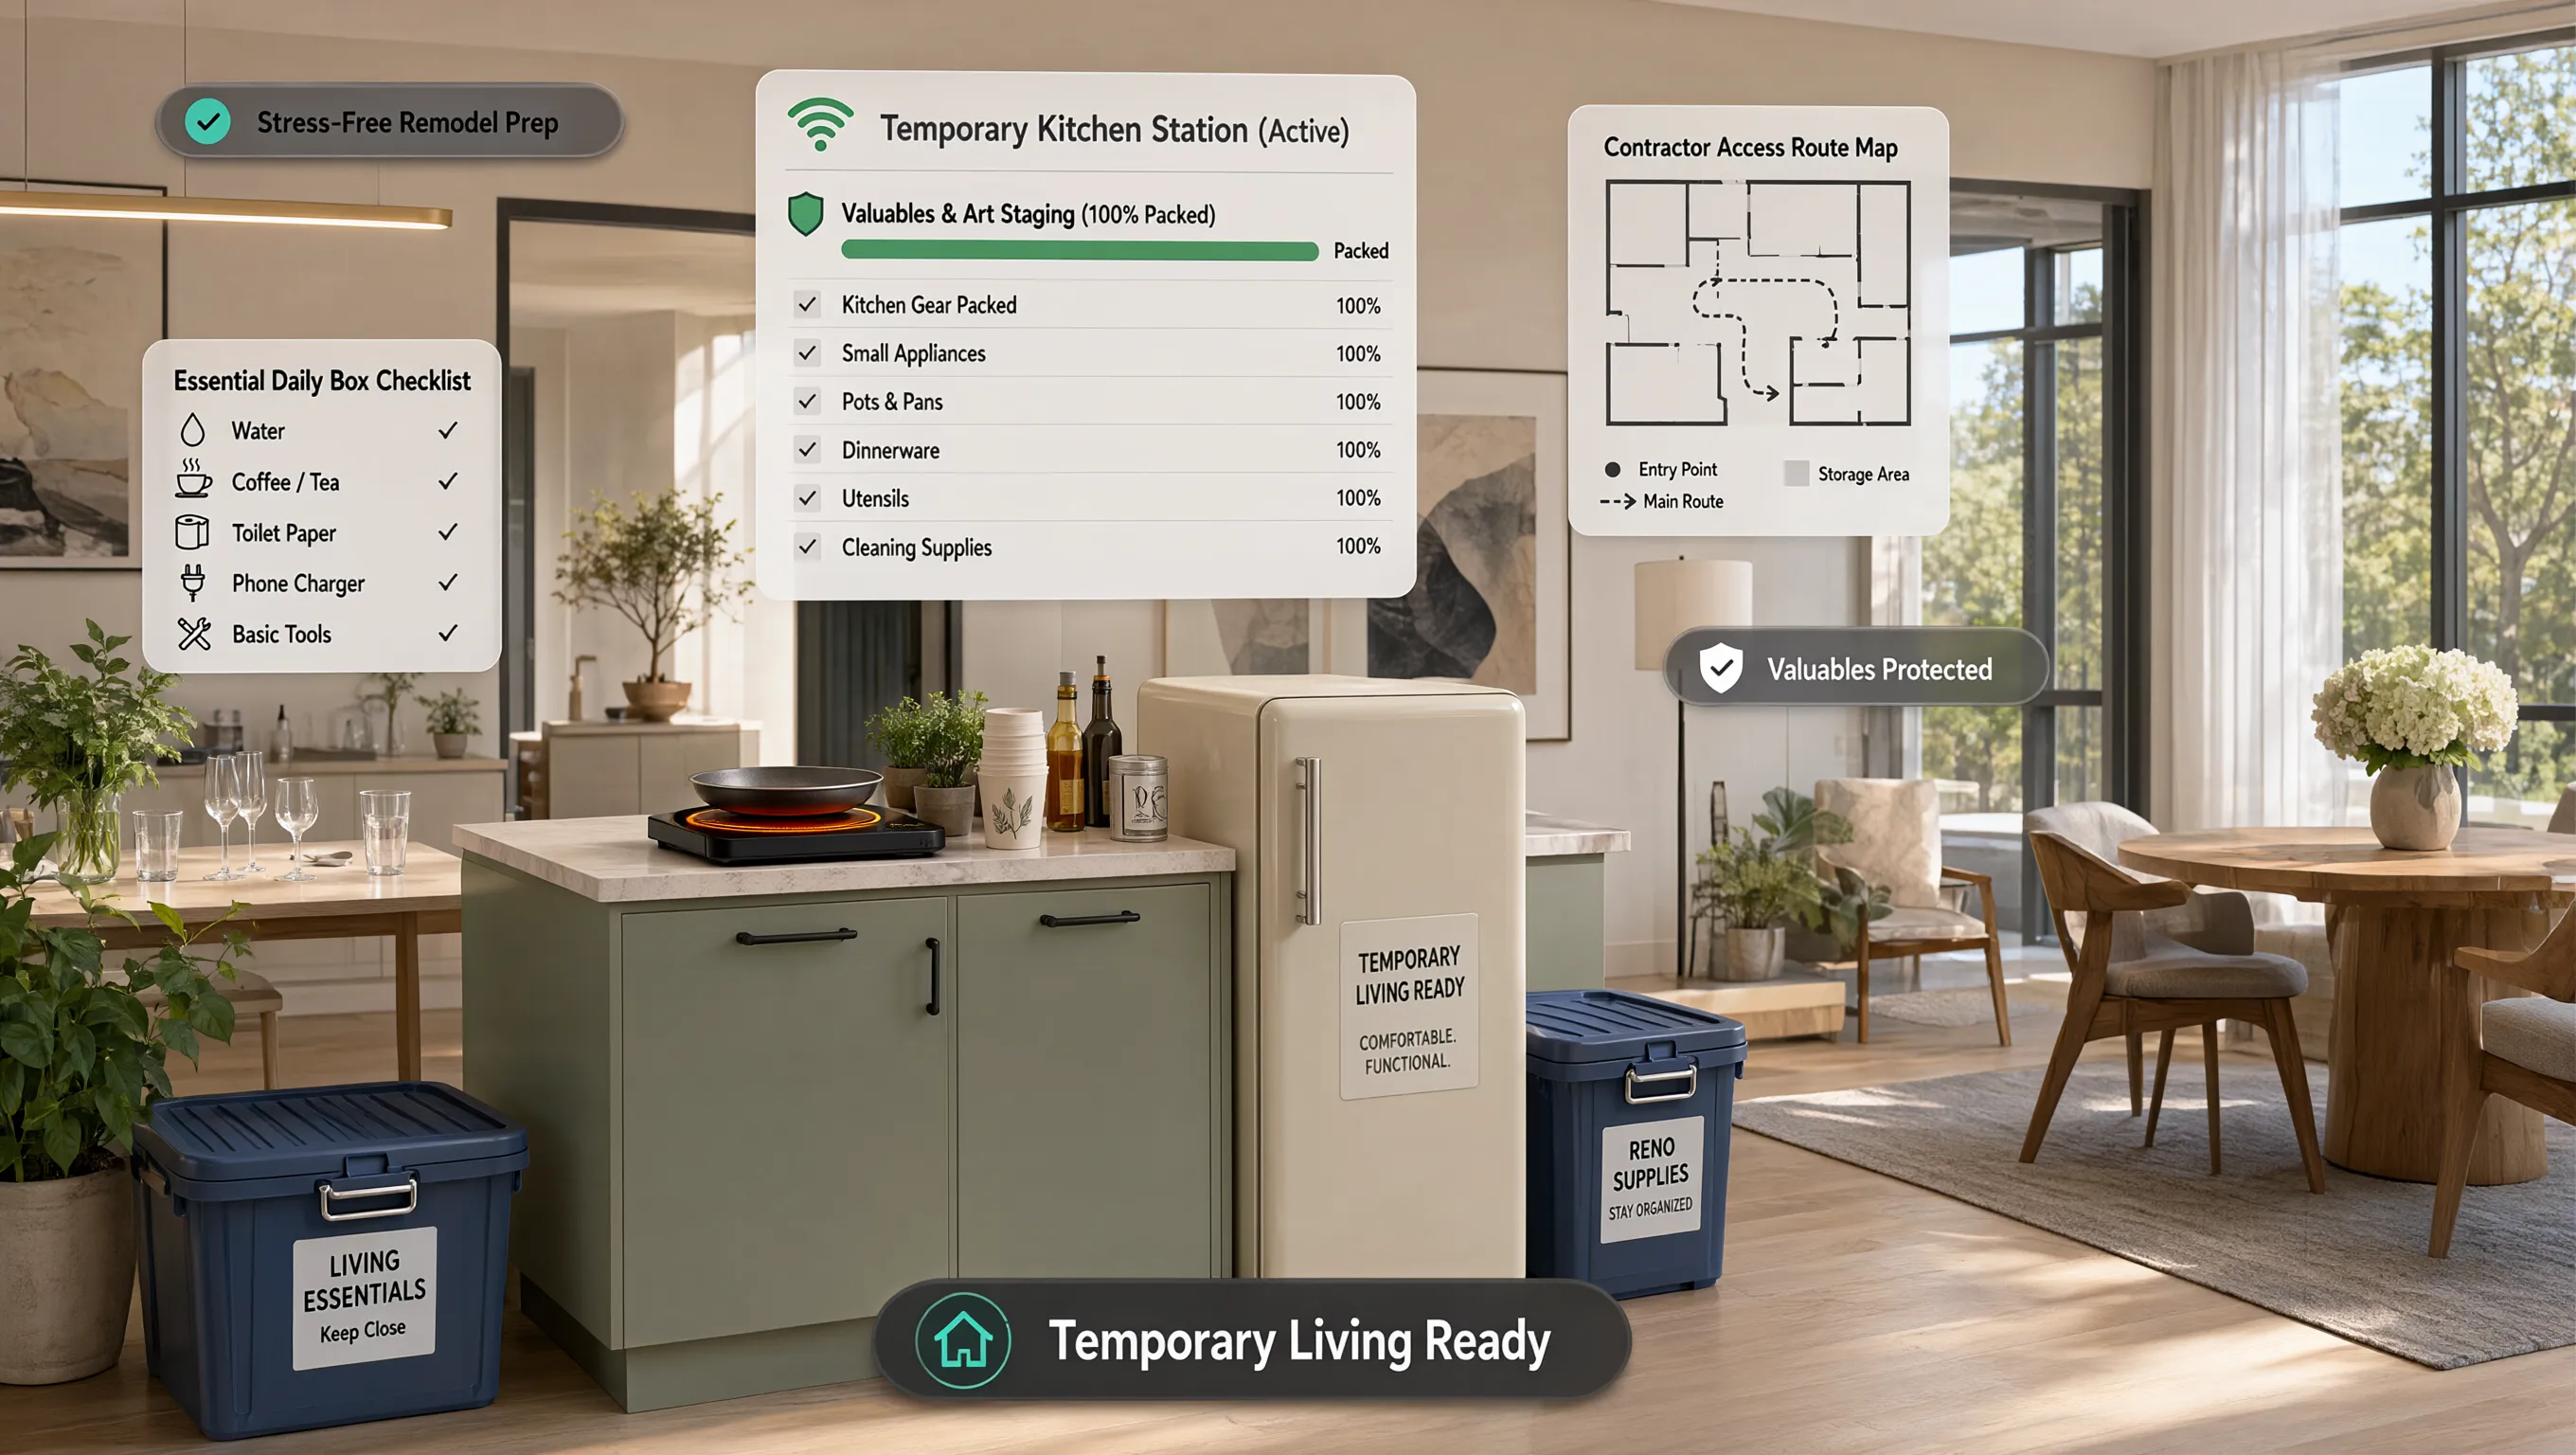
6. Set Up a Temporary Kitchen, Bathroom, or Sleeping Area
Taking a primary kitchen or bathroom offline for several weeks can severely strain daily family routines if you haven't built a fully functional temporary setup in advance.
Setting up a temporary kitchen and living zone before construction starts keeps daily life feeling surprisingly normal.
[ Unused Guest Room / Basement ]
                 |
                 +---> Electric Induction Cooktop + Countertop Oven
                 +---> Compact Mini-Fridge & Water Dispenser
                 +---> Disposable Paper Goods & Storage Caddies
                 +---> Fold-Out Prep Table & Trash Station
                 |
                 v
[ Fully Functional Temporary Kitchen Station ]
Essential temporary setup strategies:
- Build a Temporary Kitchen Hub: Set up a clean countertop in a guest bedroom, basement, or dining room. Equip it with a microwave, toaster oven, single-burner electric induction cooktop, mini-fridge, and a coffee station.
- Organize Meal Prep and Wash Stations: Use disposable compostable plates and eating utensils to minimize dishwashing. Set up a tub for dirty dishes that can be washed in a secondary bathroom sink or laundry tub.
- Protect Sleeping Sanctuaries: Keep mattresses covered in plastic dust covers and run portable air purifiers inside bedrooms to ensure clean, quiet sleep throughout the project.
7. Decide Whether You Can Safely Stay in the House
One of the most important questions homeowners face is: "Should we stay living in the house during renovation, or pack up and rent a temporary apartment?"
Making this decision based on objective health, noise, and utility conditions—rather than guesswork—prevents mid-project stress and health hazards.
Key factors to evaluate:
- Access to Basic Utilities: If your home will be without running water, electricity, or toilet access for more than 24 hours, you must arrange alternative housing.
- Health and Environmental Safety: If your home was built before 1978 and involves lead paint removal, asbestos abatement, or extensive drywall sanding, families with young children, pregnant women, or severe asthma should move off-site during high-dust phases.
- Noise and Remote Work: Heavy demolition and power saws create loud, constant noise. If you work from home, plan alternative workspace arrangements during active construction hours.
8. Make a Plan for Dust, Noise, Pets, and Children
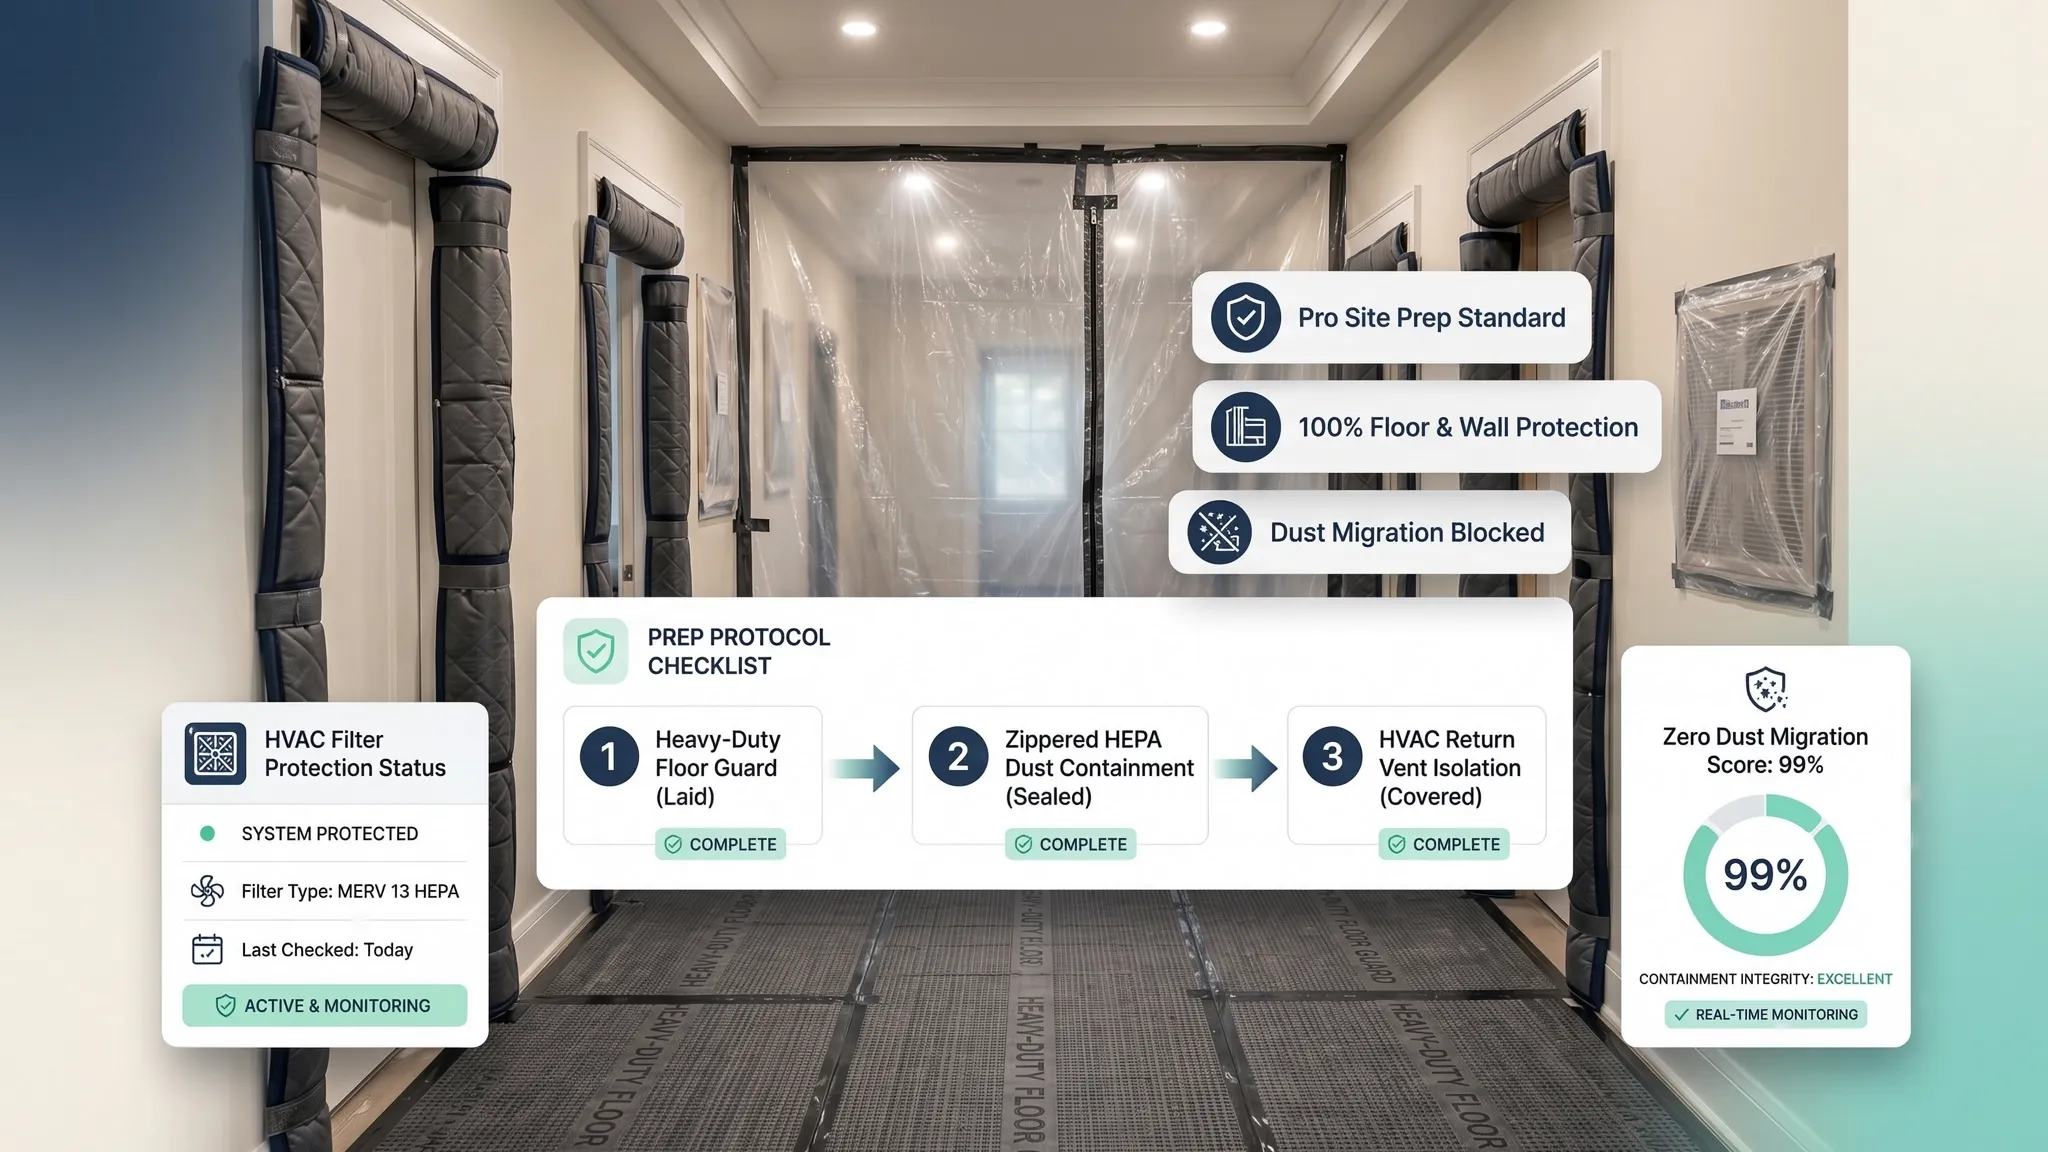
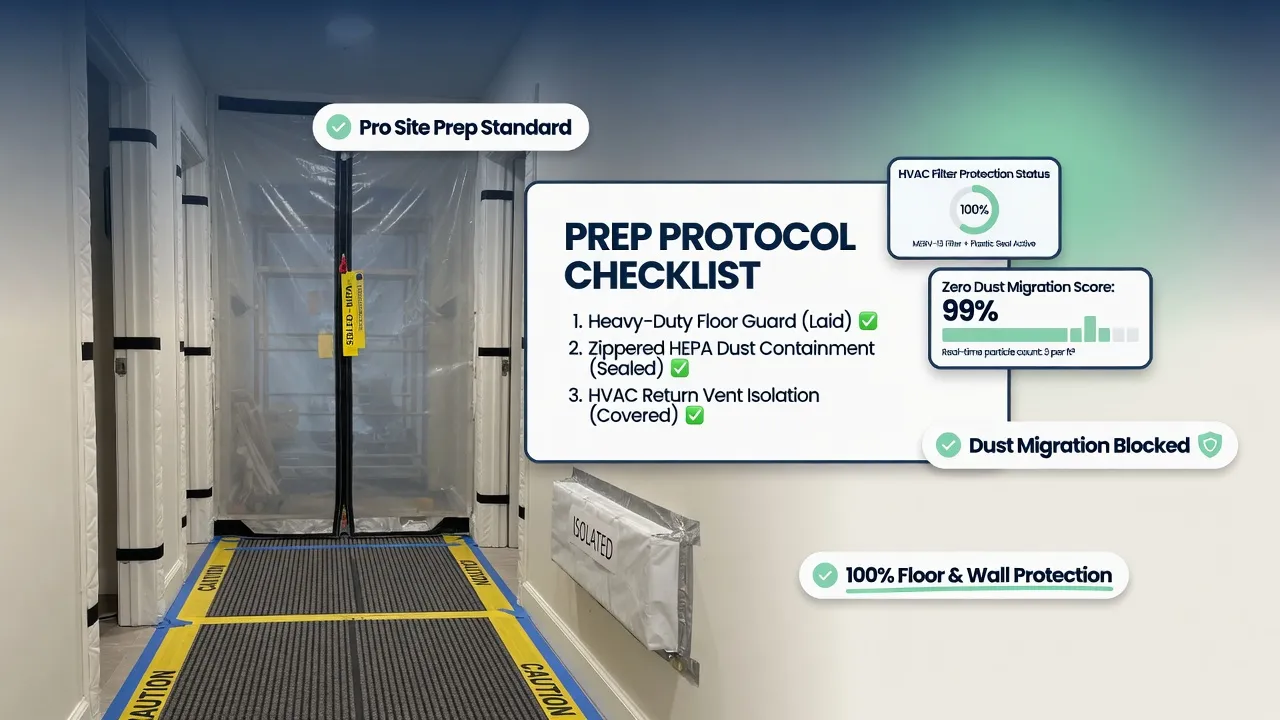
Renovation dust has a uncanny ability to find its way through microscopic cracks, settling inside closed kitchen cabinets and bedroom closets rooms away from the construction area.
Executing a proactive dust and safety plan keeps your air clean and keeps vulnerable family members safe.
[ Active Construction Zone ] ===( ZipWall Plastic Barrier + Magnetic Door )===> [ Clean Living Zone ]
  - Negative Pressure Fan                                                         - HEPA Air Scrubber
  - Sealed HVAC Returns                                                           - Pet & Child Safety Gate
Proactive containment tactics:
- Build ZipWall Plastic Barriers: Install heavy 6-mil plastic floor-to-ceiling barrier curtains with self-closing magnetic doors across all doorways leading into active work zones.
- Seal HVAC Vents Completely: Cover all supply and return air vents inside the construction zone with plastic sheeting and blue painter's tape so microscopic dust doesn't enter your home's central heating and cooling ducts.
- Protect Pets and Children: Set up sturdy, locking safety gates at top and bottom stairs and hallway entrances to keep dogs, cats, and toddlers completely clear of open subfloors, sharp tools, and electrical cords.
9. Confirm Contractor Access, Deliveries, and Waste Removal
Construction projects move fast. If a plumbing crew arrives at 7:00 AM and nobody is there to unlock the front door, or if a delivery truck cannot park due to street parking restrictions, your timeline grinds to an immediate halt.
Establishing clear access logistics keeps your job site running smoothly from day one.
  [ Confirm Key Access & Lockbox Codes ]
                     |
  [ Designate Parking Spots for Crew Trucks & Dumpsters ]
                     |
  [ Establish Dedicated Trash & Materials Staging Zone ]
Logistical readiness steps:
- Install a Contractor Lockbox: Mount a secure mechanical combination lockbox containing a house key on your front porch or garage entry door so tradespeople can access the site without you having to stay home all day.
- Designate Parking and Dumpster Zones: Clear space in your driveway for contractor vans and large trash dumpsters. Check local city municipal codes to see if street parking or dumpster permits are required.
- Establish Material Staging Areas: Designate a dry, secure space—such as a clean garage bay or covered patio—where heavy materials, lumber, and tile pallets can be unloaded safely.
10. Check Which Fixtures, Materials, and Decisions Are Still Outstanding
There is nothing more frustrating for a general contractor than having a crew ready to install a tile shower or vanity light, only to discover the homeowner hasn't picked out grout colors or that the faucet is backordered for six weeks.
Resolving every single material choice before demolition day prevents expensive change orders and mid-project delays.
Material checklist before demo:
- Inspect Delivered Products: Open boxes of faucets, sinks, lighting fixtures, and tile pallets as soon as they arrive. Verify there are no cracks, missing parts, or transit damages before installation day.
- Confirm Tile Overages: Ensure you have ordered at least 10% to 15% extra tile beyond exact room square footage to account for tile cuts, corner fitting, and future repairs.
- Finalize Layout Specifications: Lock in exact cabinet knob placements, outlet locations, mirror heights, and paint sheen levels with your contractor in writing.
11. Back Up Important Information and Secure Valuable Items
A busy construction site means dozens of sub-contractors, delivery drivers, and workers moving in and out of your home daily.
Taking steps to protect valuable personal items and sensitive paperwork prevents accidental loss, damage, or theft.
[ Sensitive Belongings ] ===> Move to Off-Site Safe or Lockable Bedroom
[ Financial & Legal Docs] ===> Scan to Encrypted Cloud Storage
[ Contact Directory ]   ===> Keep Hard Copy & Digital Emergency Phone Numbers
Valuables protection checklist:
- Lock Away High-Value Items: Move jewelry, passports, cash, sensitive financial paperwork, prescription medications, and small family heirlooms off-site to a safe deposit box or lock them inside an untouched room.
- Back Up Digital Files: Back up all home computers, hard drives, and digital photos to secure cloud storage before heavy construction creates power surges or vibrations near electronic equipment.
- Maintain a Contractor Directory: Keep a printed list of all project contacts—including your general contractor, plumber, electrician, architect, and insurance agent—posted on your refrigerator and saved in your phone.
12. Know What Must Be Handled by Qualified Professionals
While handling simple preparation tasks like packing boxes and pulling up old carpets can save money, attempting complex technical work without proper licenses can void home insurance, trigger building code violations, or cause severe injury.
Knowing where DIY preparation ends and licensed professional trade work begins is essential for safety.
- Stripping curtains & wall art
- Laying Ram Board floor covers
- Assembling temporary kitchen shelves
- Gas line disconnections & cap-offs
- Structural load-bearing wall demo
- Asbestos & lead paint abatement
Critical safety and permit rules:
- Leave Main Electrical and Gas to Licensees: Always hire licensed electricians and plumbers to disconnect main gas lines, relocate high-voltage wiring, or isolate main water valves before demolition begins.
- Verify Building Permits: Ensure all required city building permits for structural, electrical, and plumbing alterations are approved and physically posted on-site before construction starts.
- Check Lead and Asbestos Regulations: If your home was constructed before 1978, hire a certified environmental tester to check old plaster, popcorn ceilings, and vinyl floor tiles for lead and asbestos before tearing into walls.
To review official home safety codes, electrical permit guidelines, and structural building standards, consult the National Association of Home Builders (NAHB).
13. Follow This One-Week and One-Day Pre-Renovation Checklist
Don't let the final 7 days before construction turn into a chaotic rush.
Follow this structured, time-mapped pre-renovation timeline to ensure every box is packed, every surface is protected, and your contractor walks onto a perfectly prepared job site.
  [ 7 Days Before: Clear Rooms, Assemble Storage & Confirm Deliveries ]
                                  |
  [ 3 Days Before: Build Temporary Kitchen & Seal Unused HVAC Vents ]
                                  |
  [ 1 Day Before: Lay Floor Protection, Install Lockbox & Set Zip Walls ]
                                  |
  [ Morning of Demo: Final Walk-Through & Clear Contractor Driveway ]
The Ultimate Pre-Renovation Countdown Checklist:
1 Week Before Construction Begins
Visualize Your Complete Home Renovation Before Construction Starts
What if you could eliminate pre-renovation anxiety entirely by stepping into your newly remodeled home before a single contractor arrives or a single dollar is spent on demolition?
When you are preparing your house for a major remodel, trying to visualize how new wall layouts, floor transitions, cabinet colors, and lighting choices will look together can feel overwhelming. A single miscalculation on paper can turn into a costly change order once construction starts.
With DesignHome, you don't need to learn complicated professional CAD software or navigate steep design learning curves. You can simply upload a picture or floor plan of your room to instantly visualize endless furniture arrangements, test floor continuity, preview paint palettes, and customize high-end interior designs tailored to your exact floor plan.
Eliminate pre-renovation uncertainty—craft and refine your complete dream home vision with total confidence before demolition day ever begins.
External Resources & Industry Standards
To explore deeper technical insights into home space planning, trade safety, and building codes, consult these authoritative industry resources:
- National Association of Home Builders (NAHB) – Official guidelines for home remodeling, trade scheduling, safety standards, and project cost estimating.
- American Society of Interior Designers (ASID) – Professional standards for residential space planning, material selection, and structural layouts.
- U.S. Environmental Protection Agency (EPA) – Lead & Dust Safety – Official federal safety guidelines for lead-safe renovation, containment, and indoor air quality.
- International Code Council (ICC) – Residential building codes, electrical permit guidelines, and plumbing installation safety standards.
- National Fire Protection Association (NFPA) – Residential electrical safety codes, smoke detector placement, and job site fire prevention guidelines.
Frequently Asked Questions About Preparing a House for Renovation
How early should I start packing and preparing my house before renovation day?
Start packing and clearing rooms at least two to three weeks before construction begins. Ordering temporary storage containers, clearing out furniture, protecting floors, and building temporary kitchens takes significantly more time than most homeowners anticipate.
What is the best way to keep construction dust out of the rest of my house?
Install floor-to-ceiling 6-mil plastic ZipWall barrier curtains equipped with magnetic pass-through doors, cover all HVAC return and supply vents inside the construction zone so dust doesn't enter ductwork, and run a portable HEPA air scrubber 24/7 near the work area entrance.
Should I clear out rooms that are adjacent to the active renovation zone?
Yes. Vibrations from heavy demolition, hammering, and tile removal can easily travel through shared wall studs, causing framed art, wall mirrors, and loose decorative shelves in adjacent rooms to shake and fall off the wall. Clear fragile items off walls in neighboring rooms before demo starts.
What should I do with my pets during a home renovation?
Keep pets entirely isolated from active construction areas using sturdy, locking safety gates. The constant loud noise, open doors, power cords, and strange workers can cause severe anxiety for dogs and cats. Consider booking a pet daycare or boarding facility during heavy demolition days.
How do I protect my hardwood floors from heavy contractor boots and tools?
Cover finished hardwood and tile floors along main walking corridors with heavy-duty Ram Board cardboard sheets. Tape every seam tightly with heavy-duty builder's tape so dirt, grit, and spilled liquids cannot seep through underneath.
What basic electrical and plumbing tasks can I prepare myself versus hiring a pro?
You can safely assemble temporary kitchen shelves, pack away appliances, and move furniture yourself. However, shutting off main electrical panels, disconnecting gas lines, relocating high-voltage wiring, or capping main water supply lines must strictly be handled by licensed, insured trade professionals.
How do I set up a functional temporary kitchen while my main kitchen is remodeled?
Set up a folding table in an unused room or dining space equipped with a microwave, toaster oven, single-burner electric induction cooktop, mini-fridge, and water dispenser. Use disposable compostable plates and eating utensils to minimize dishwashing in secondary sinks.
What happens if I discover unexpected damage during pre-renovation teardown?
Keep a dedicated 15% cash contingency buffer in your renovation budget specifically for unforeseen issues like hidden water rot, outdated wiring, or mold uncovered during demolition. Review options immediately with your contractor before approving written change orders.


